Setup Selection
Viper — Operation — Menu Options
-
Set Up
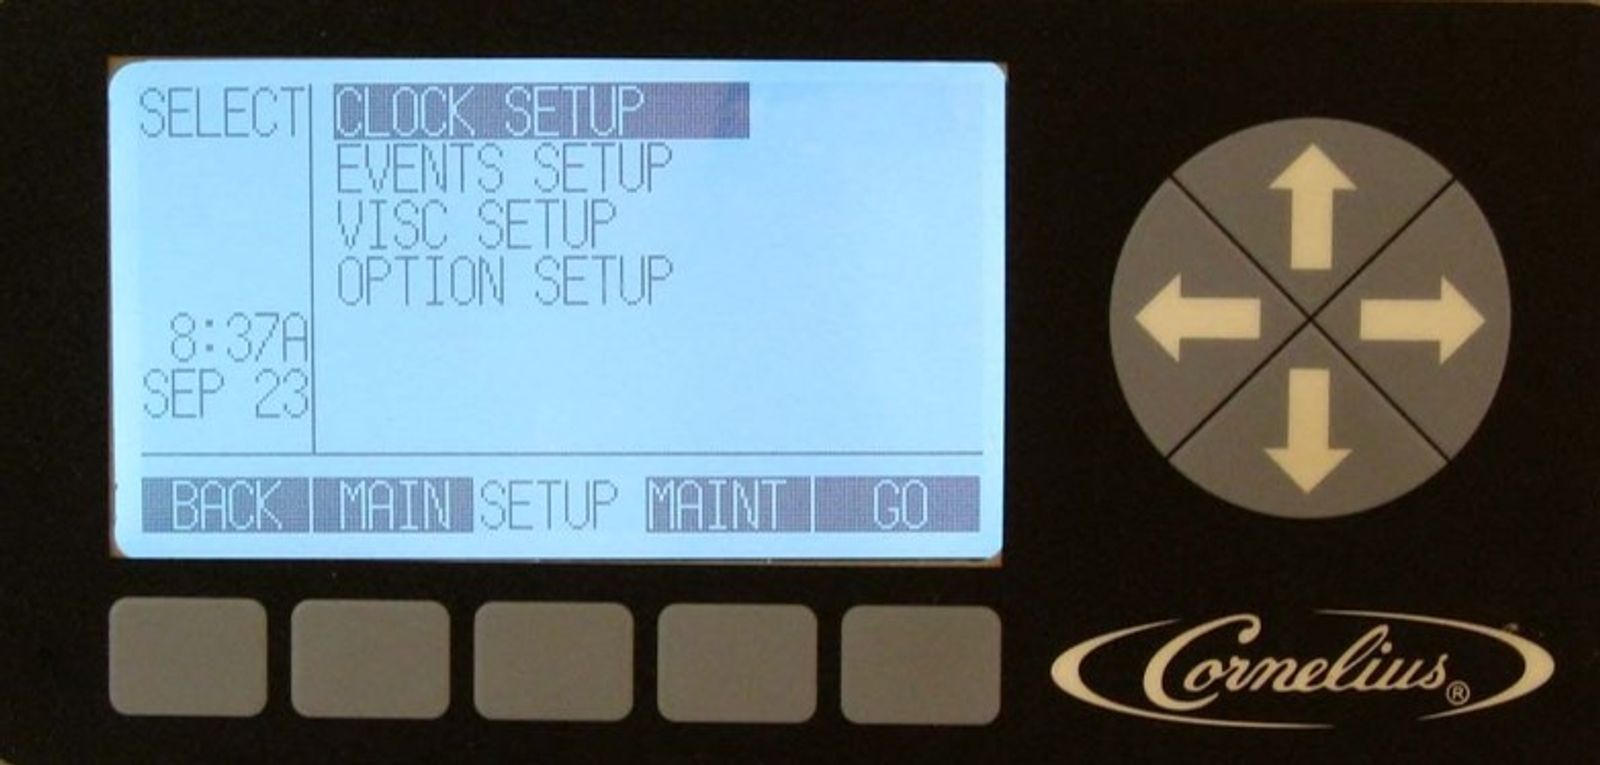
To access the SETUP menu from the Barrel Status screen, press the MENU button. The next screen will have three options, MAIN, SETUP, and MAINT. Press the button under SETUP, this displays the setup screen menu. The Setup menu provides the means to change various settings to local preferences.
-
Clock
In the SETUP screen, use the arrows to highlight CLOCK SETUP on the display. When the desired option is highlighted, press the GO button to access that menu screen.
-
Clock Setup
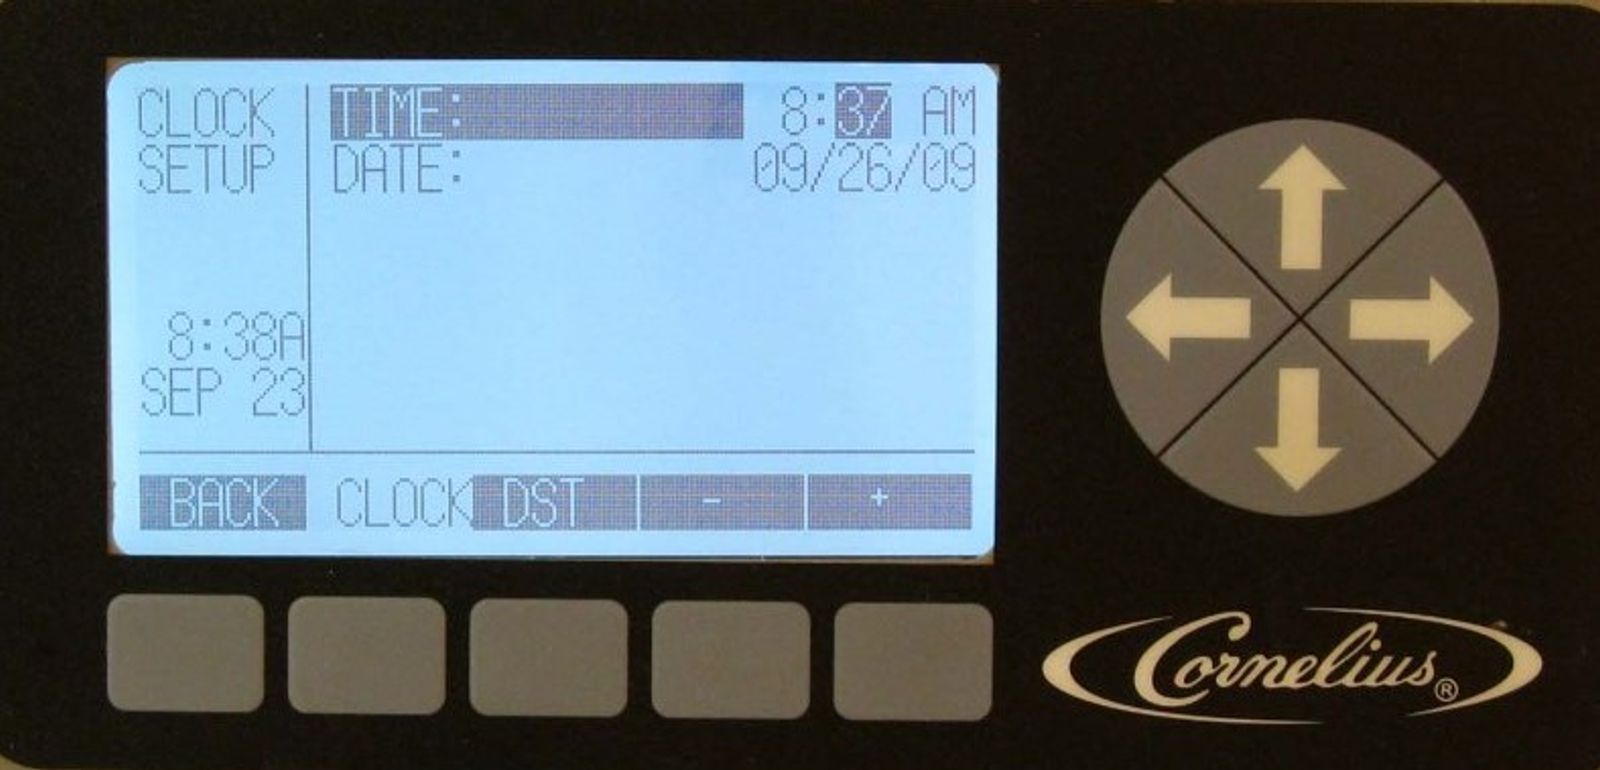
When in the CLOCK SETUP screen, use the keypad arrows to toggle between hours, minutes, AM/PM and months, days and years to highlight. Then use the minus (-) and plus (+) buttons to make changes. When time and date are set, press the BACK button to save and go back to SETUP screen.
-
DST
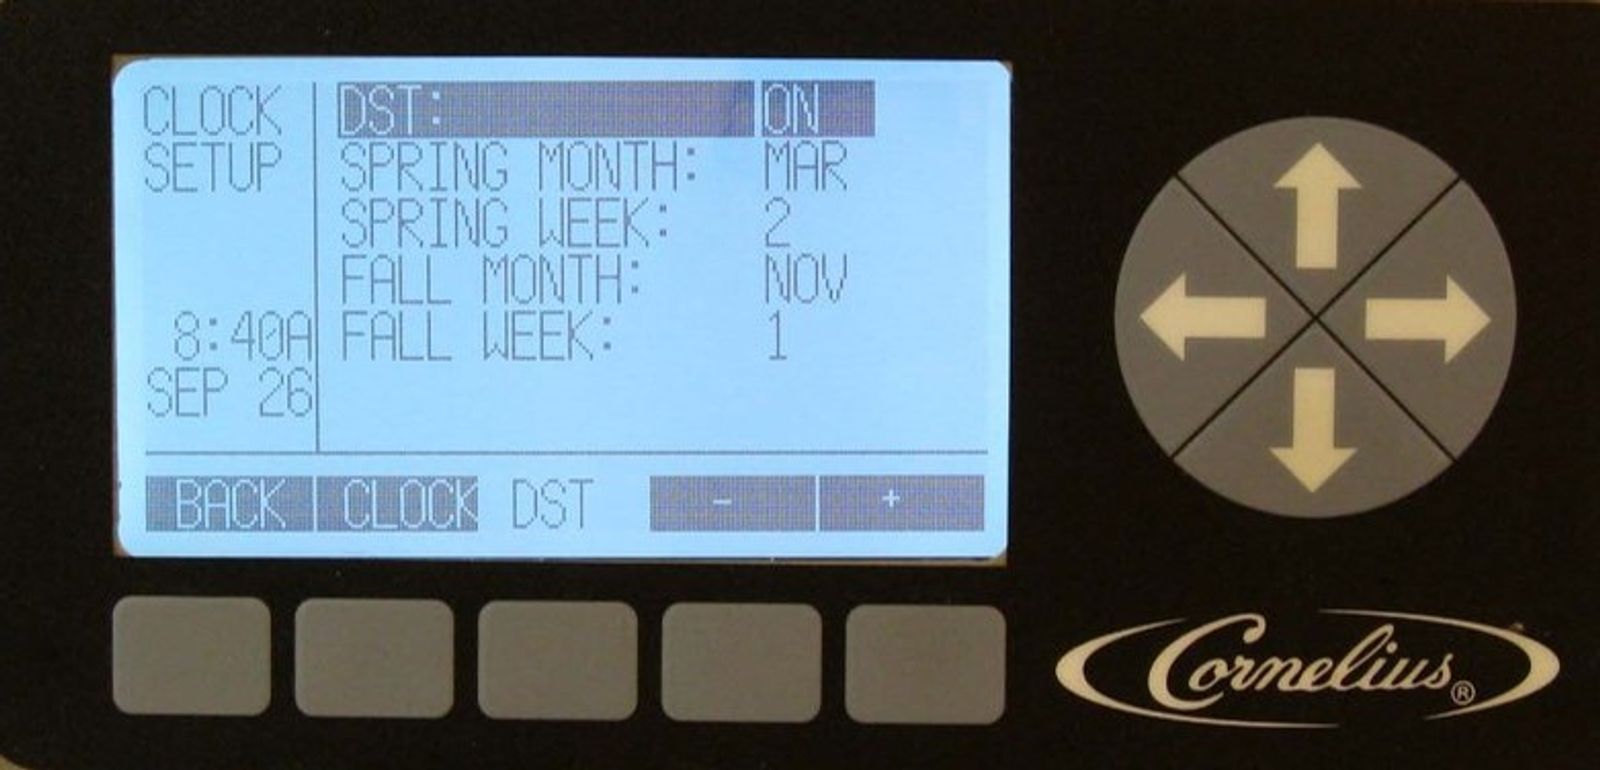
When in the DST set up screen, use the minus (-) button to turn off Daylight Savings Time and plus (+) button to turn on Daylight Savings Time. When ON is selected, a secondary screen will display. In this screen you can select the months and weeks DST will change. Use the up and down arrows to highlight the spring and fall months and weeks. Then use minus (-) and plus (+) buttons to select the correct month and week. For weeks, the selections are 1, 2, 3 and L for last.
-
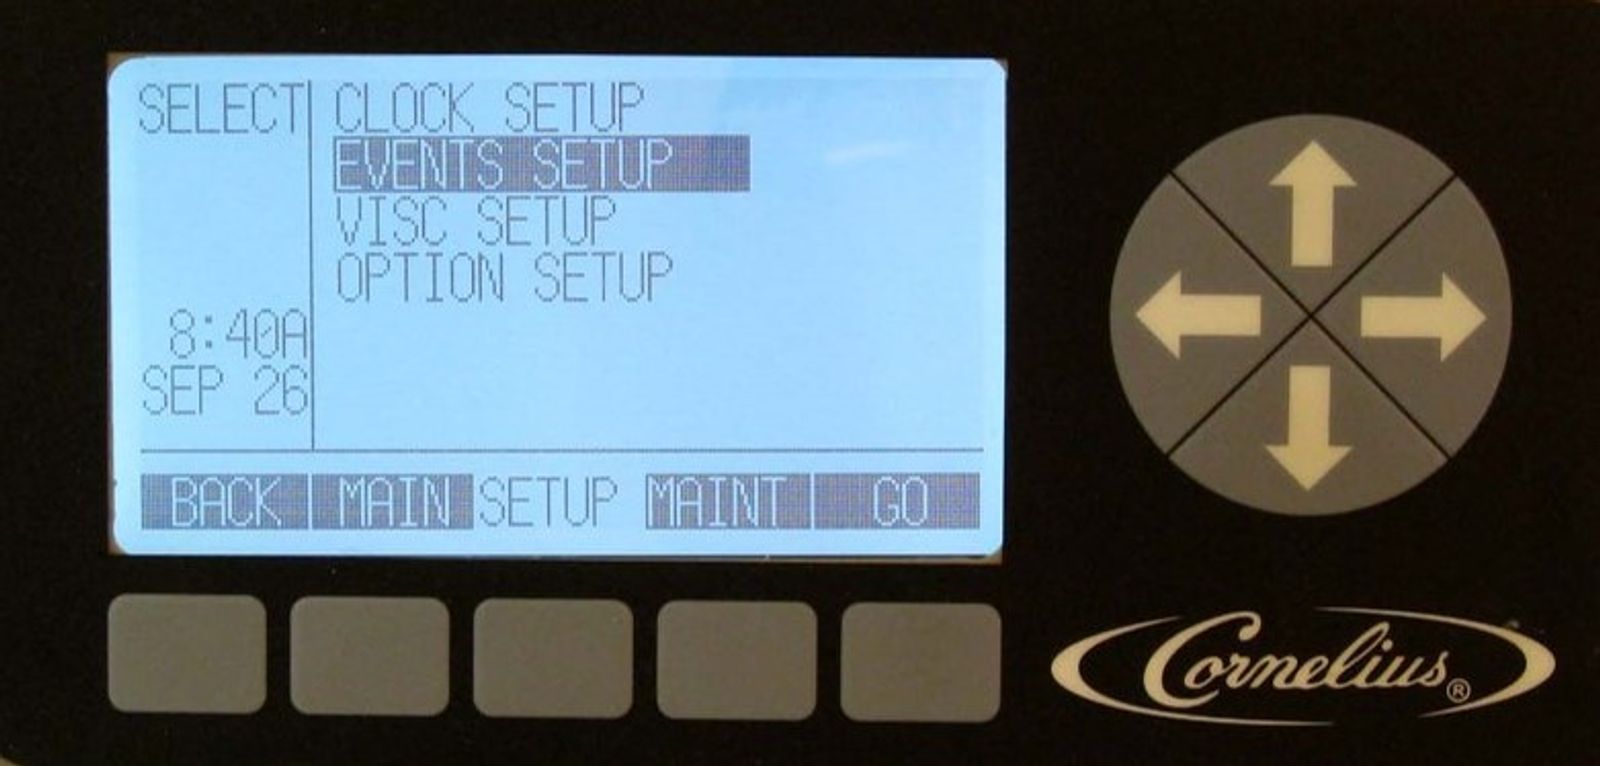
Events
In the SETUP screen, use the arrows to highlight the choices on the display. When EVENTS SETUP is highlighted, press the GO button to access that menu screen. The EVENTS SETUP menu allows the user to set SLEEP and WAKEUP periods. Set sleep for one hour after closing and set wake for 1 hour prior to open. And Defrost LOCKOUT can be set to prevent the defrost cycle during peak busy times and are set in 15 minutes increments. These parameters may be programmed for any day or for all days and should be set depending on business requirements.
-
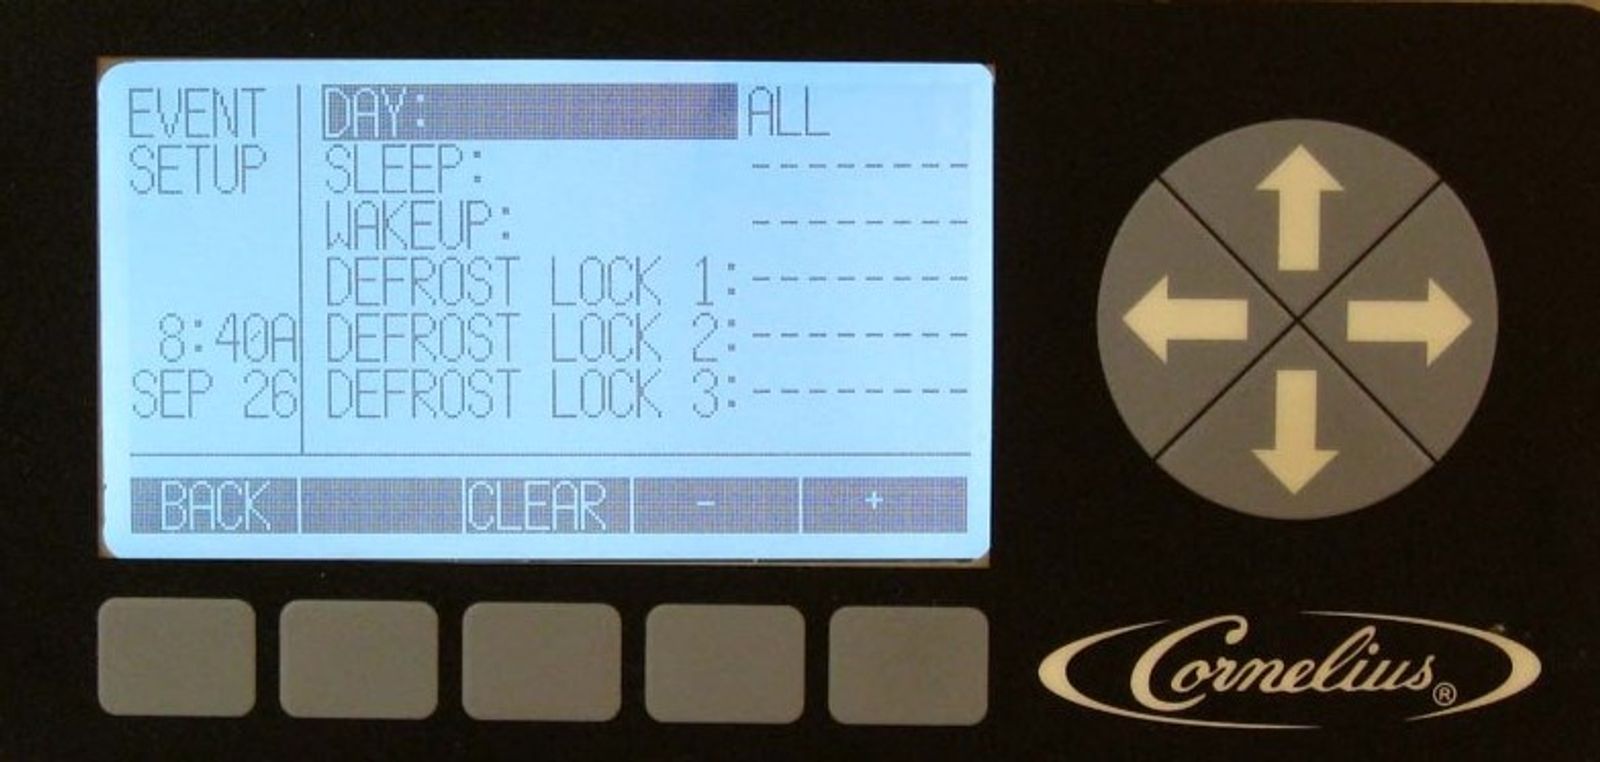
Events -Day
When in the EVENT SETUP screen, use the keypad arrows to toggle to DAY and then use the minus (-) and plus (+) button's to set the desired day or all days. The CLEAR button clears the highlighted field on the menu. A specific day will override the setting for ALL.
-
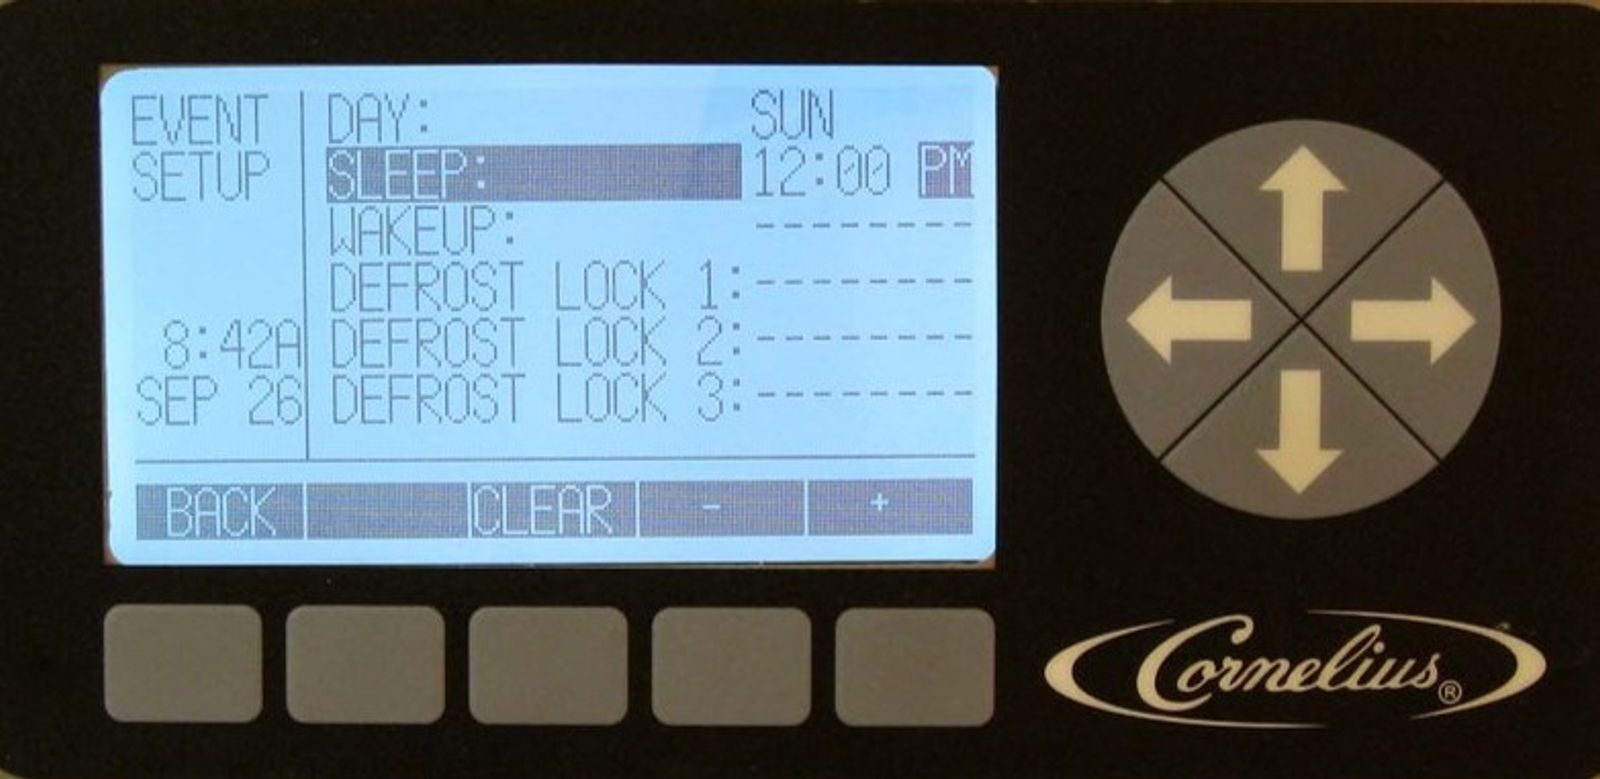
Events -Sleep
When in the EVENT SETUP screen, use the arrows to select SLEEP. First, use the arrows to select the hour and the minute fields, then press the plus (+) or minus (-) buttons to change the hour and minutes. Times are set in 15-minute increments. If the 12-hour clock option is selected, use the arrows to select the AM/PM field. The CLEAR button clears the highlighted field on the menu.
-
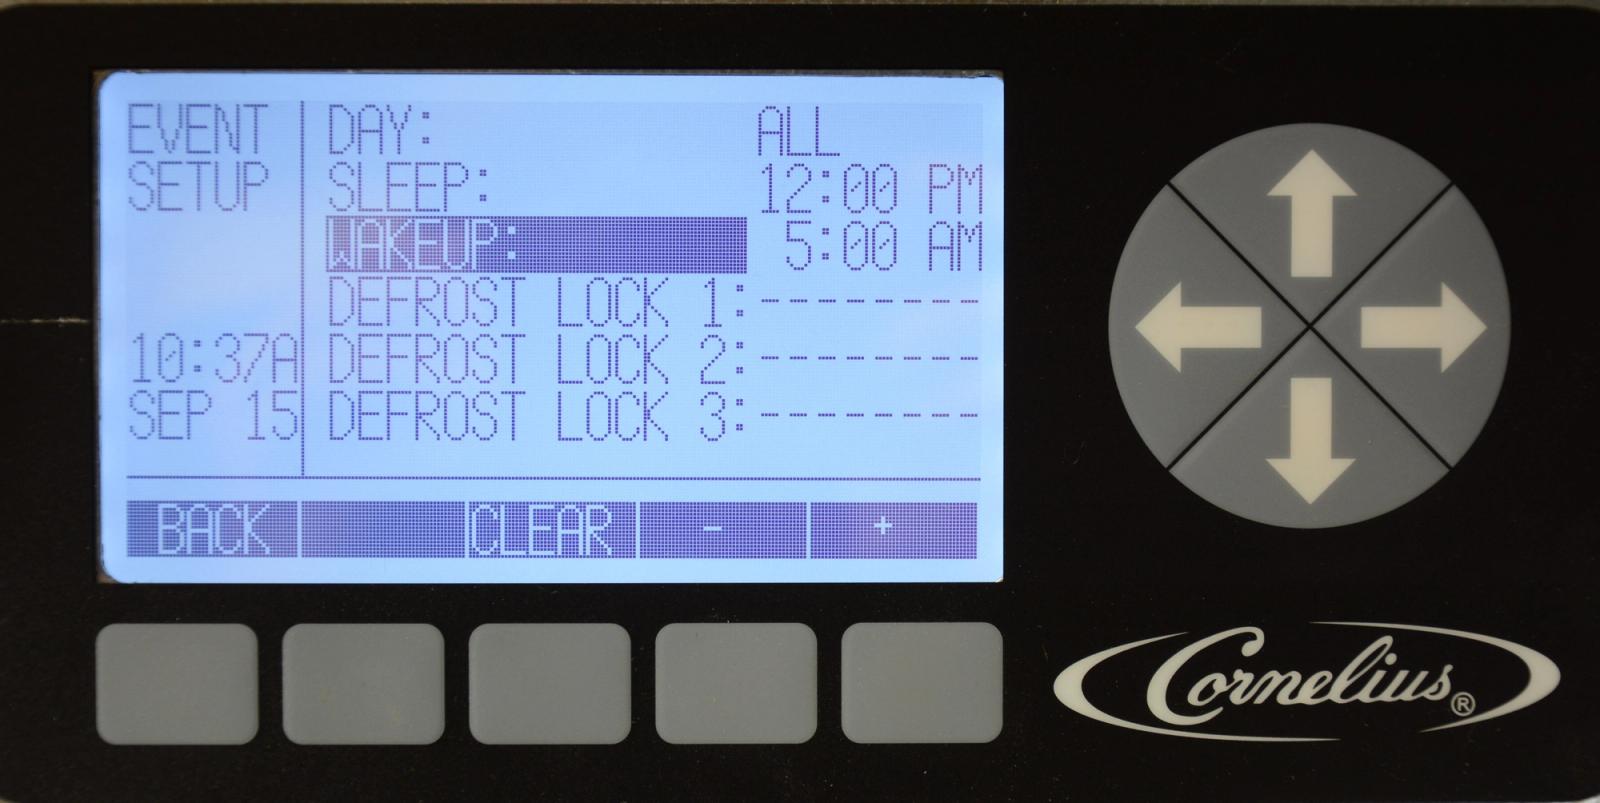
Events -Wakeup
In the EVENT SETUP screen, use the arrows to select WAKEUP and to select the hour and the minute fields. Then press the plus (+) or minus (-) buttons to change the hour and minutes. Times are set in 15-minute increments. If the 12-hour clock option is selected, use the arrows to select the AM/PM field. The CLEAR button clears the highlighted field on the menu.
-
Events – Defrost Lockout
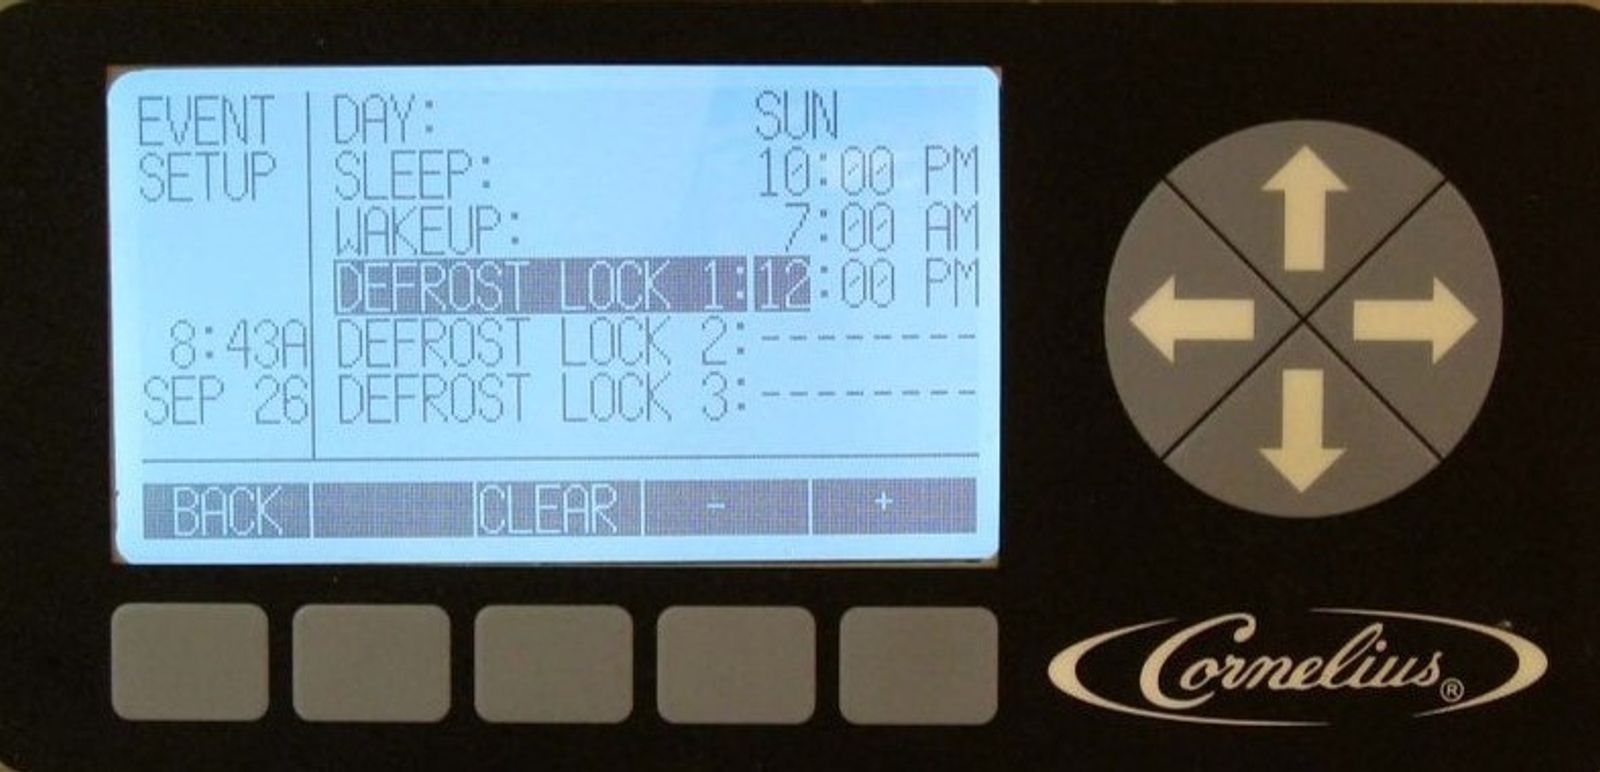
When in the EVENT SETUP screen use the arrows to toggle to Defrost lock 1, 2 or 3 to highlight. Then use the arrows to select the hour and the minutes fields and press the plus (+) or minus (-) buttons to change the hour and minutes. Times are set in 15 minute increments. If the 12 hour clock option is selected, use the arrows to select the AM/PM field. The lockout can be set per day or for all days with up to three lockout periods of three hours each. The lockout periods can be overlapped to provide up to 8 1/2 hours of defrost lockout time. For sequential lockout periods defrost lockouts need to be overlapped by 15 minutes. The defrost lockout affects all barrels in the unit. The CLEAR button clears the highlighted field on the menu and when time and days are set press the BACK button to save and go back to SETUP screen.
Set Defrost Lock Out
Defrost lockout prevents the Viper from automatically defrosting during set times and is typically enabled if the Viper or a specific barrel is constantly in defrost during peak times. The defrost lockout affects all barrels at the same time and can be programmed to have 3 - three hour defrost lockout time slots, they can be individual or sequential for a maximum of 9 hours per day. Sequential defrost lockouts should be overlapped by 15 minutes to prevent Smart Defrost© from engaging. The Viper defrost lockouts can be set for individual days or all days to lockout the automatic defrost cycle. To set the defrost lock out times, highlight EVENTS SETUP in the select menu and press the GO button. To activate the defrost lockouts use the up or down arrows to highlight DAY, then use the + and - buttons to set the desired day or all days. To set specific lockout times, use the up or down arrows to highlight DEFROST LOCK 1, then use the left or right arrows to select the hour field and use the + and - buttons to set the desired hour. Next use the left and right arrows to select the minute field, then use the + and - buttons to set the desired minute (in 15 min increments). If the 12 hour clock option is selected, use the left and right arrows to select the AM/PM field and the + button to set the AM/PM field.
Note: Defrost lockouts are not set during manufacturing. Do not set the defrost lockout unless the times are mandated by the account based off peak times.
Example of 15 min overlapping if setting consecutive lockouts. 12:00pm-2:45pm, 2:45pm- 5:30pm, and 5:30pm-8:15pm.
-
Introduction
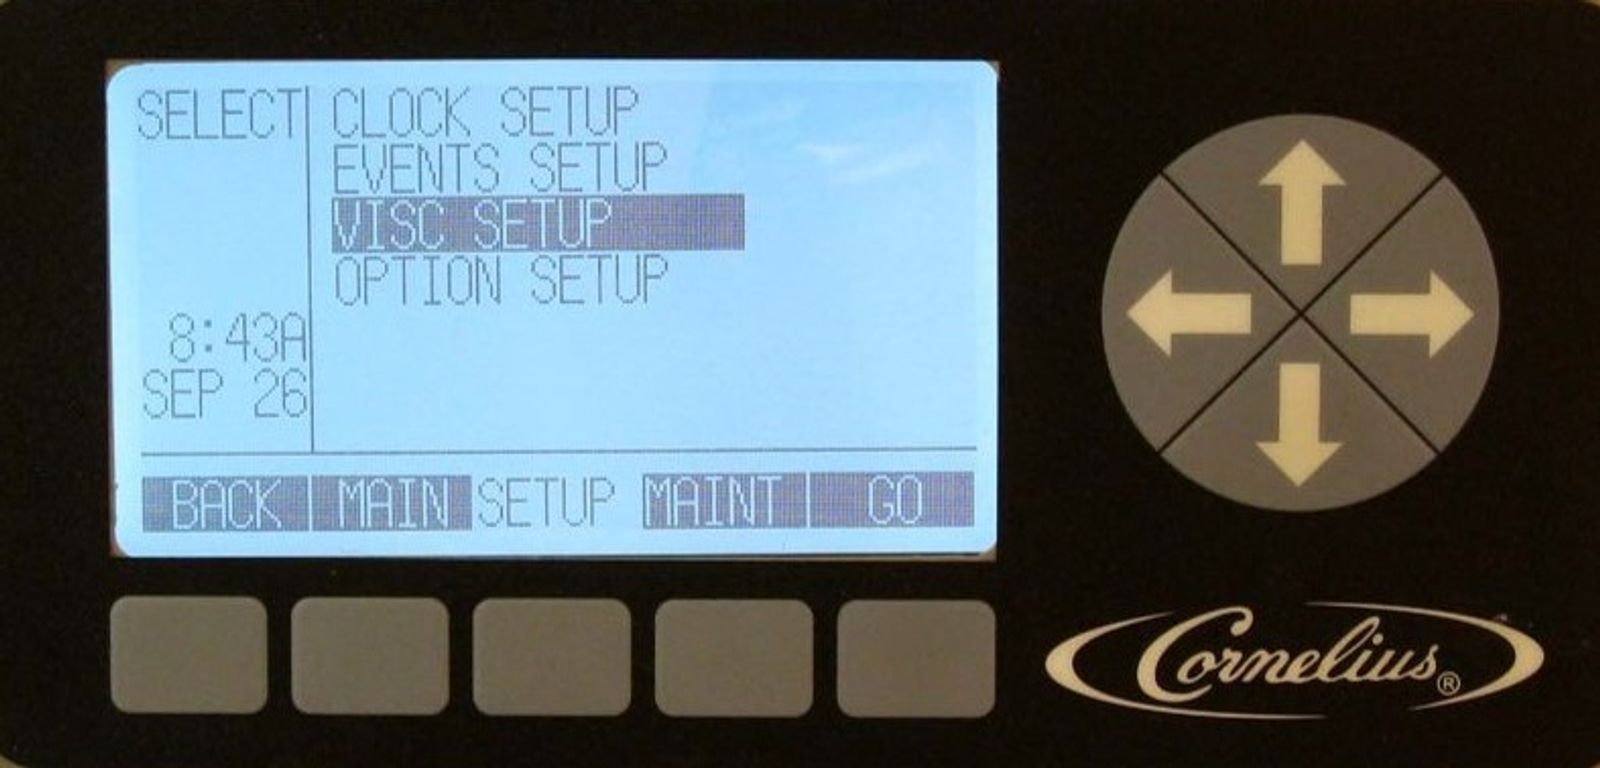
In the SETUP screen, use the arrows to highlight the VISC SETUP on the display and press the GO button to access that menu screen.
-
Viscosity - Range
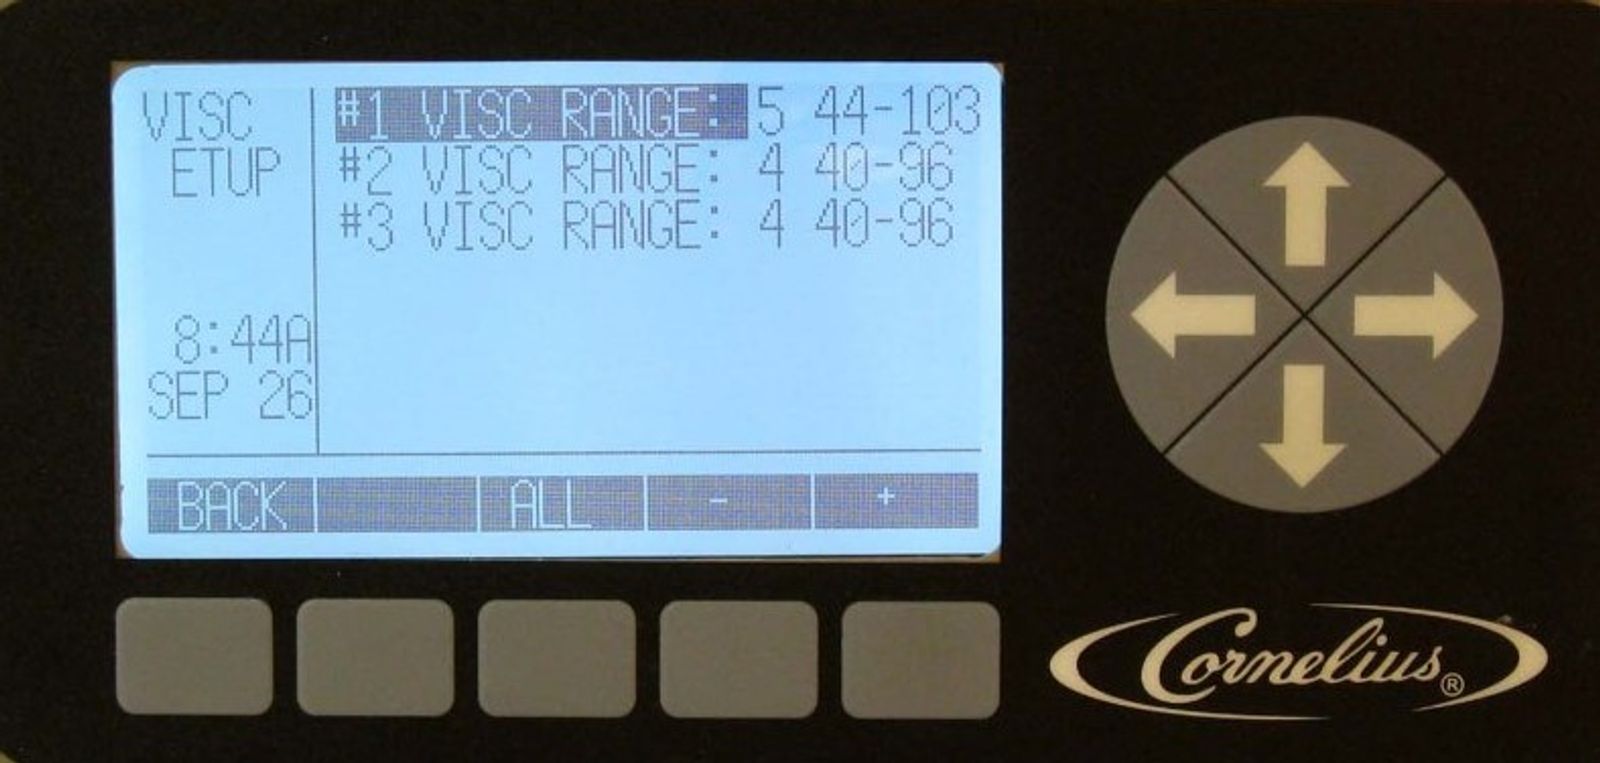
The viscosity setting controls how thick the product is by controlling the refrigeration cut in and cut out to maintain proper product viscosity. The viscosity range is 1-9, 1 being the least frozen and 9 being the most frozen with 4 being the default factory setting. To enter the viscosity setting, highlight EVENTS SETUP in the select menu and press the GO button. Use the up or down arrows to highlight VISC SETUP and press the GO button. Highlight the desired barrel and use the + or - buttons to set the desired range.
If you increase the viscosity, let the compressor cycle multiple times before making changes. This allows the change to take effect. If you need to decrease viscosity, defrost the barrel, adjust the viscosity and freeze down again.
Factory recommended settings:
FCB syrup w/ foaming Agent use range #4
FCB syrup w/o foaming Agent use range #4
FUB syrup use range #3
-
Introduction
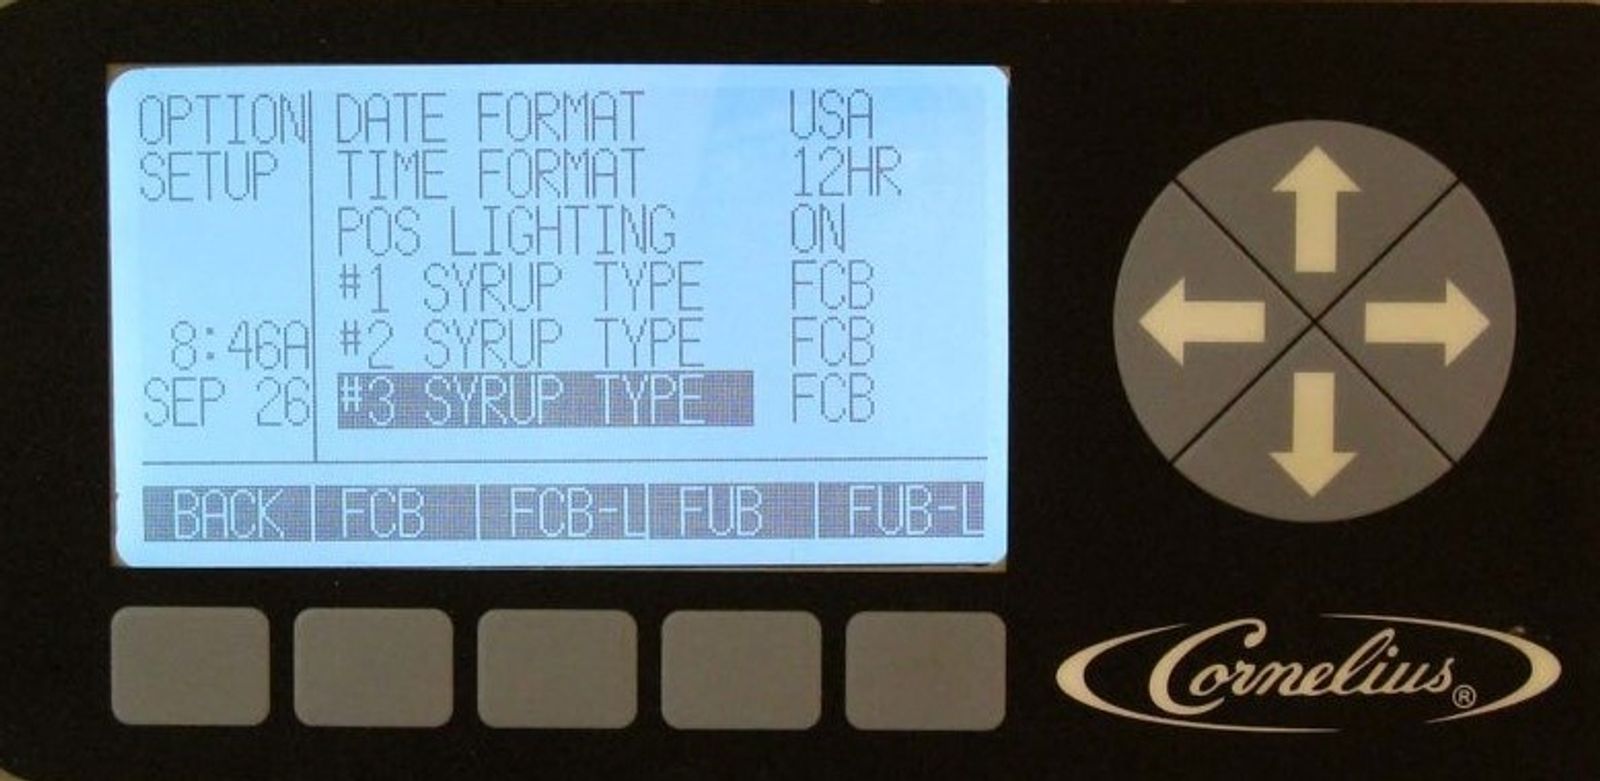
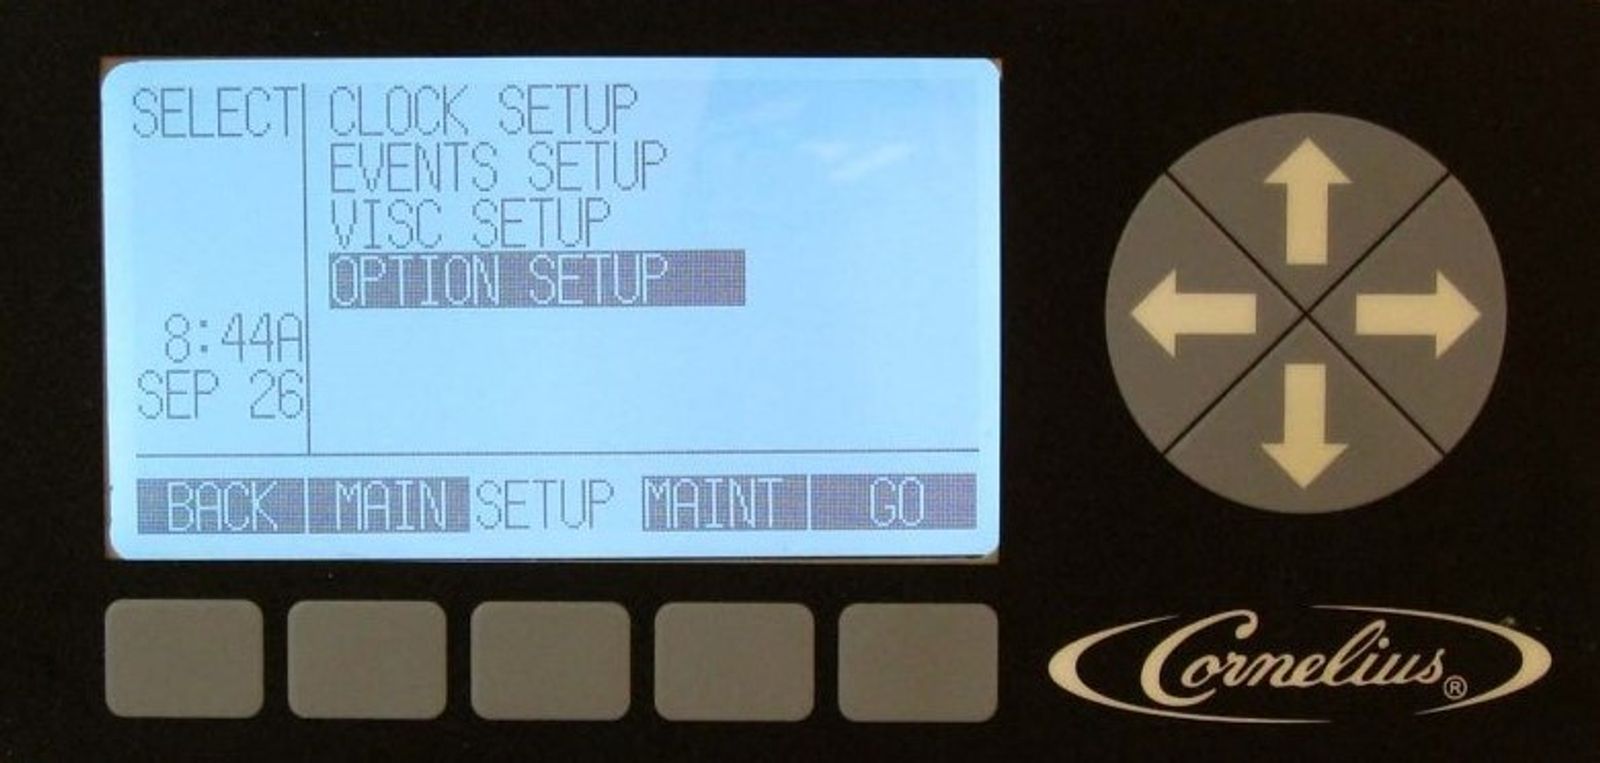
In the SETUP screen, use arrows to highlight the OPTION SETUP on the display. In Option Setup, you can select the format for temperature, date, and time along with POS lighting preference and FCB syrup type used.
-
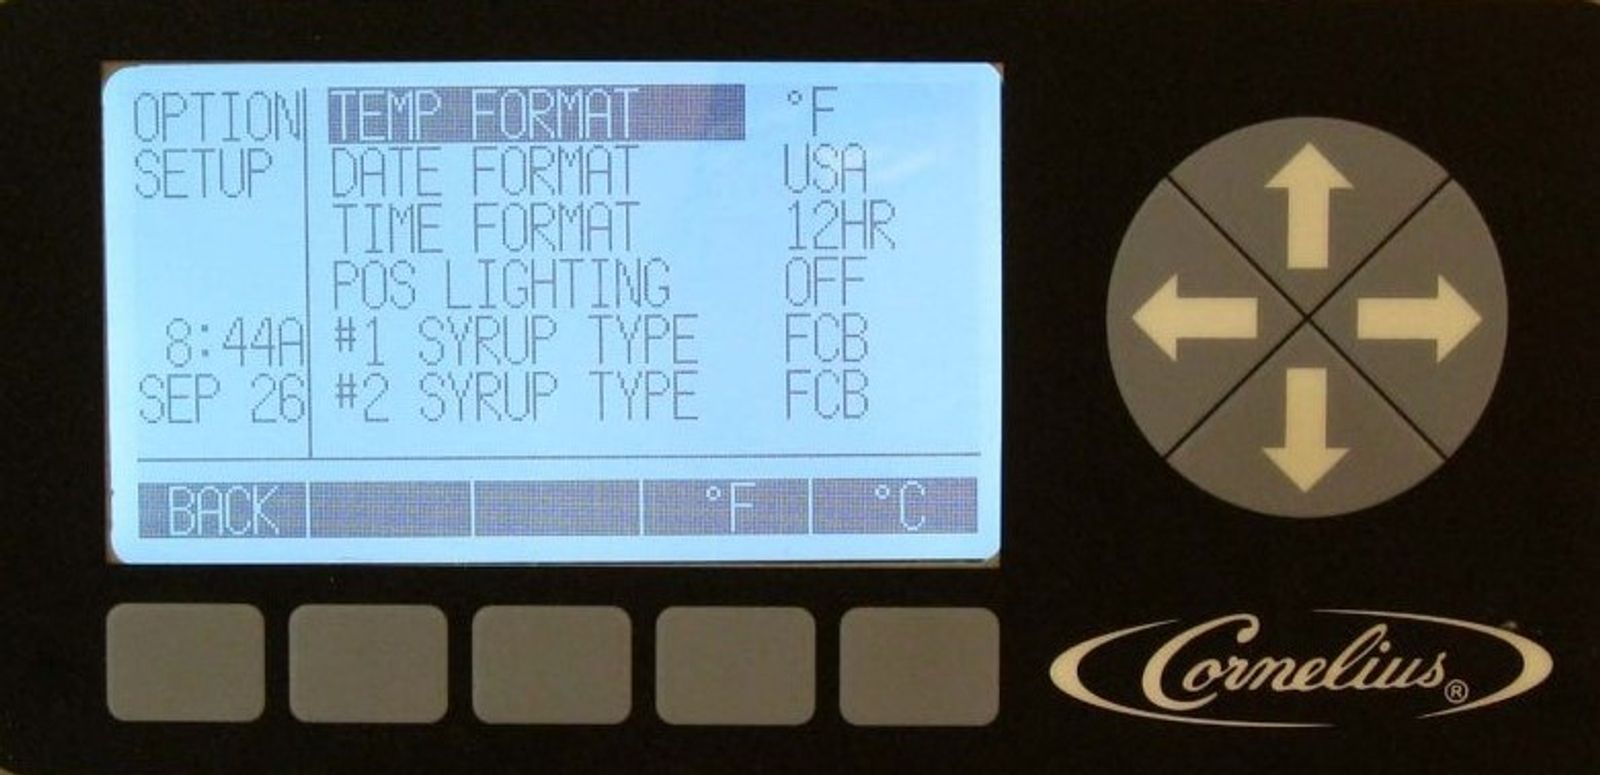
Options – Temp Format
The first option in OPTION SETUP will be TEMP FORMAT. You can change format preference for the Viper display by pressing the button below F for Fahrenheit or C for Celsius.
-
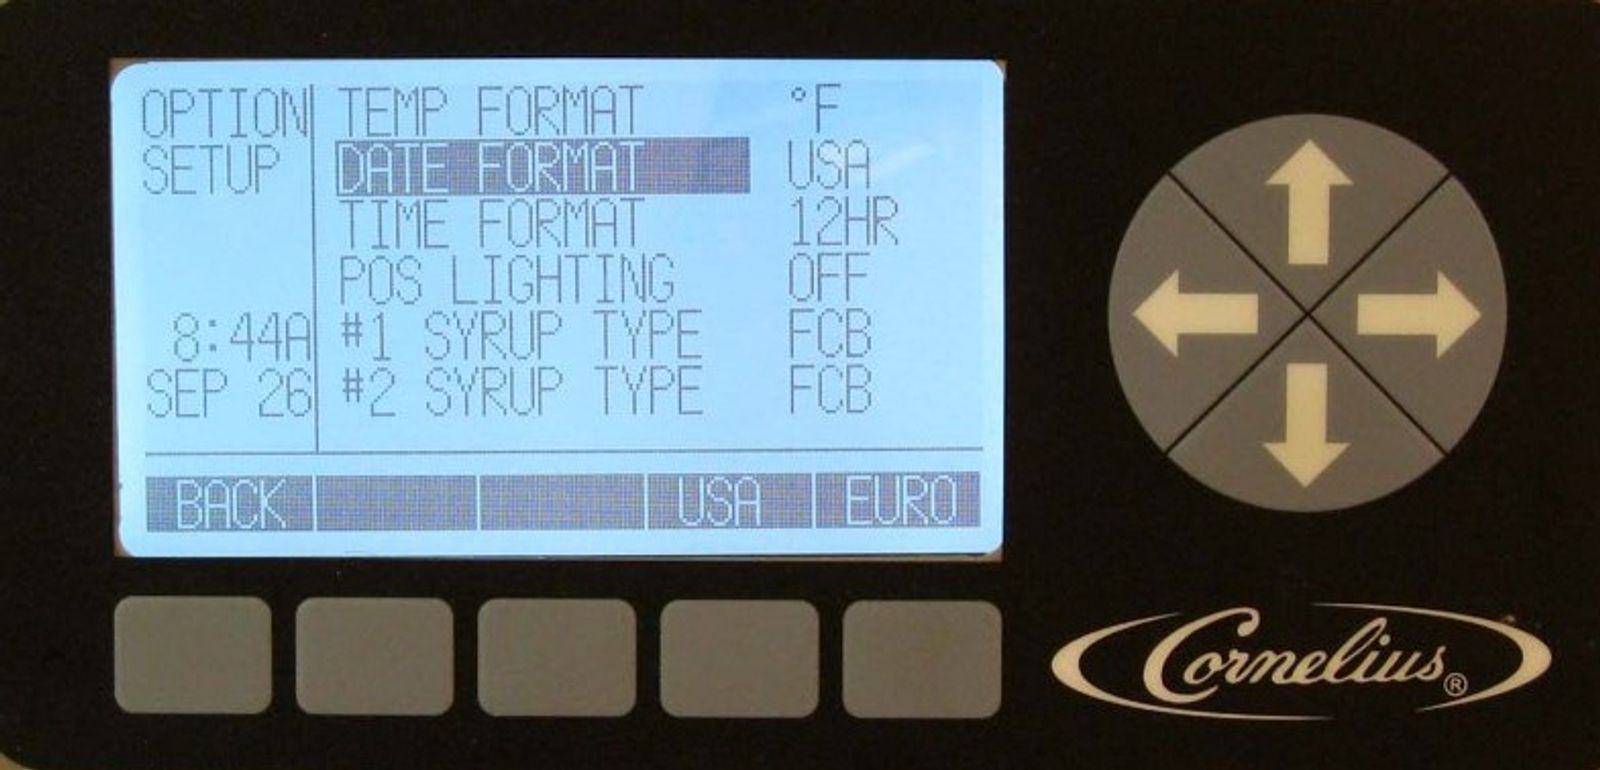
Options – Date Format
The second option in OPTION SETUP is Date Format. The date format can be displayed in either United States or European format. To display U.S. date format, press the USA button. This displays the date in mm/dd/yy format. Press the EURO button to display the date in dd/mm/yy format.
-
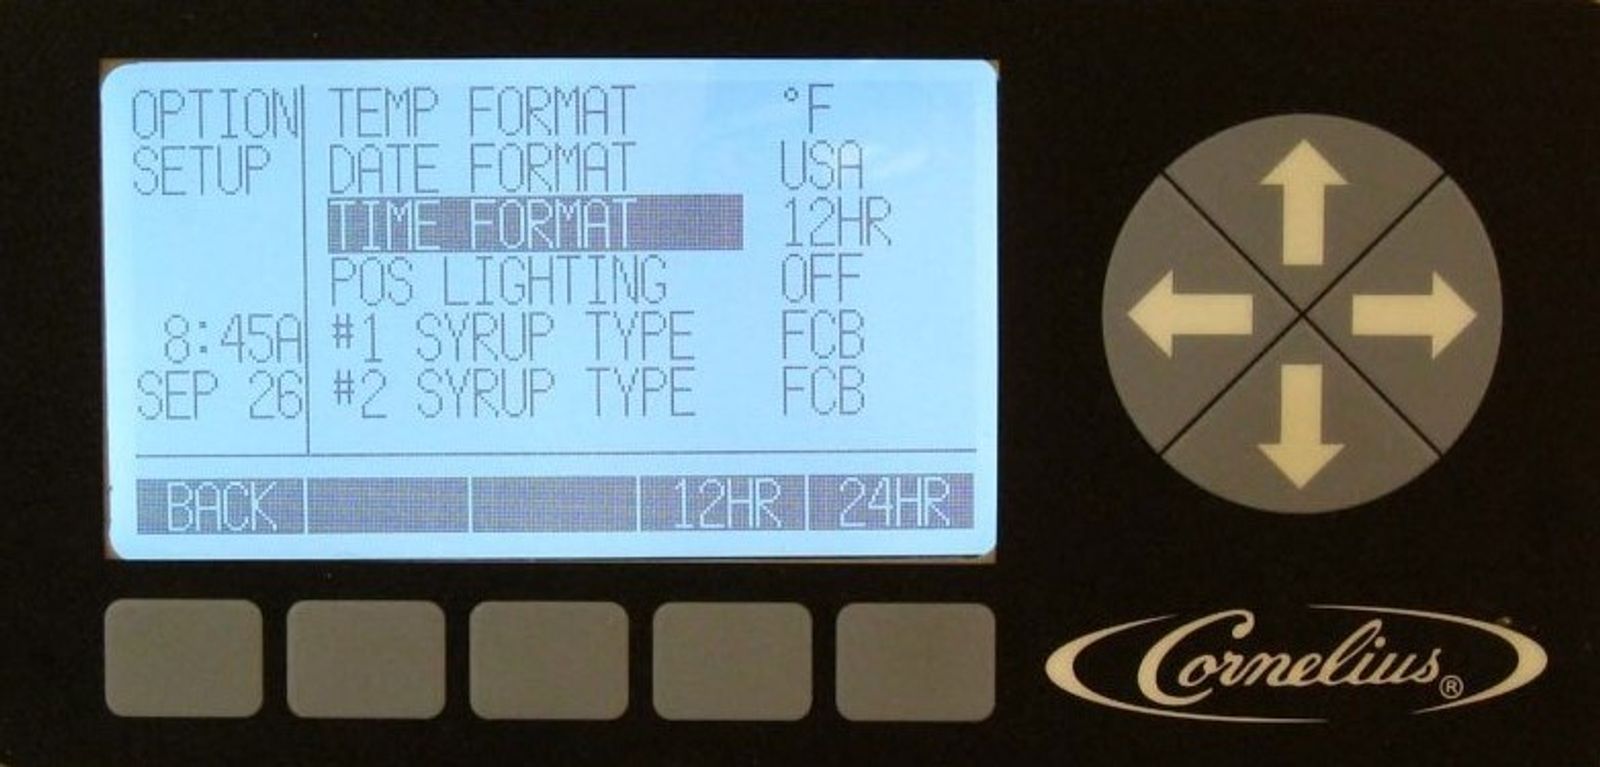
Options – Time Format
The third option IN OPTION SETUP is TIME FORMAT.
Time can be displayed in either 12 or 24-hour format. To display the clock settings in 12-hour format (1:08 P), press the 12 HR button. To display settings in 24 hour format (13:08), press the 24 HR button.
-
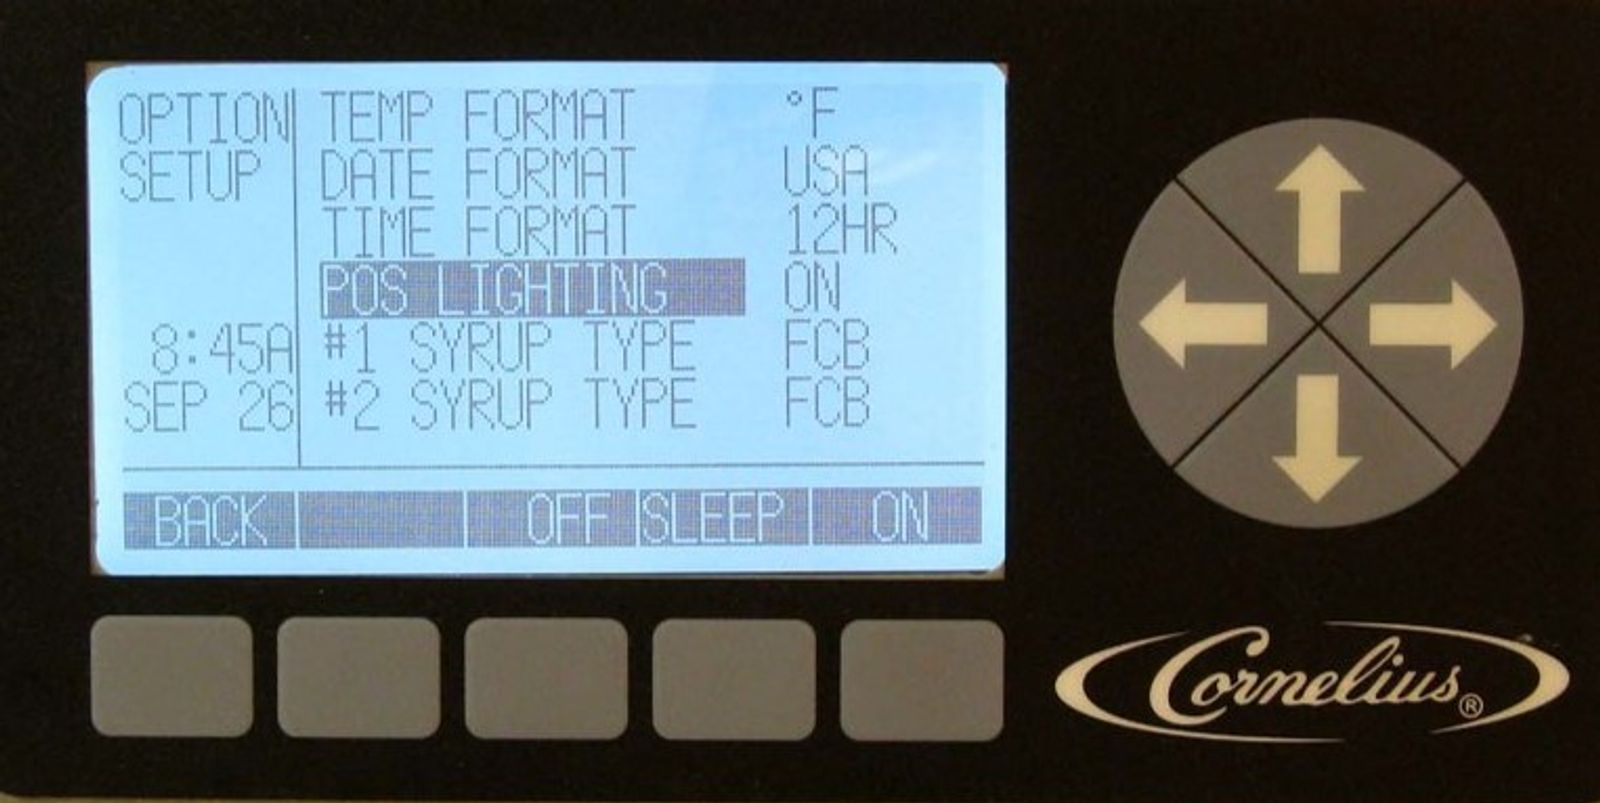
Options – POS Lighting
The fourth option in OPTION SETUP is POS LIGHTING. With the POS Lighting field highlighted, press off to turn merchandiser lighting off. To turn the merchandiser lighting on permanently, press the ON button. To turn the merchandiser lighting on and off with the Sleep settings, press the SLEEP button.
-
Options – Syrup Type
To set the syrup type, highlight EVENTS SETUP in the select menu and press the GO button. In the OPTION SETUP menu, highlight the individual barrels and select the desired syrup type by pressing the appropriate button. FCB is for Frozen Carbonated Beverage, FCB-L is for Frozen Carbonated Beverages - Light (diet), FUB is for Frozen Non-Carbonated Beverages, and FUB-L is for Frozen Non-Carbonated Beverages - Light (diet). Selecting FCB-L, FUB, or FUB-L will automatically decrease the viscosity cut in setting by 10 points.