
Media Playlist
IDC Pro Pocket Guide — Operation — Manager's Level Menu: Service Level 2
-
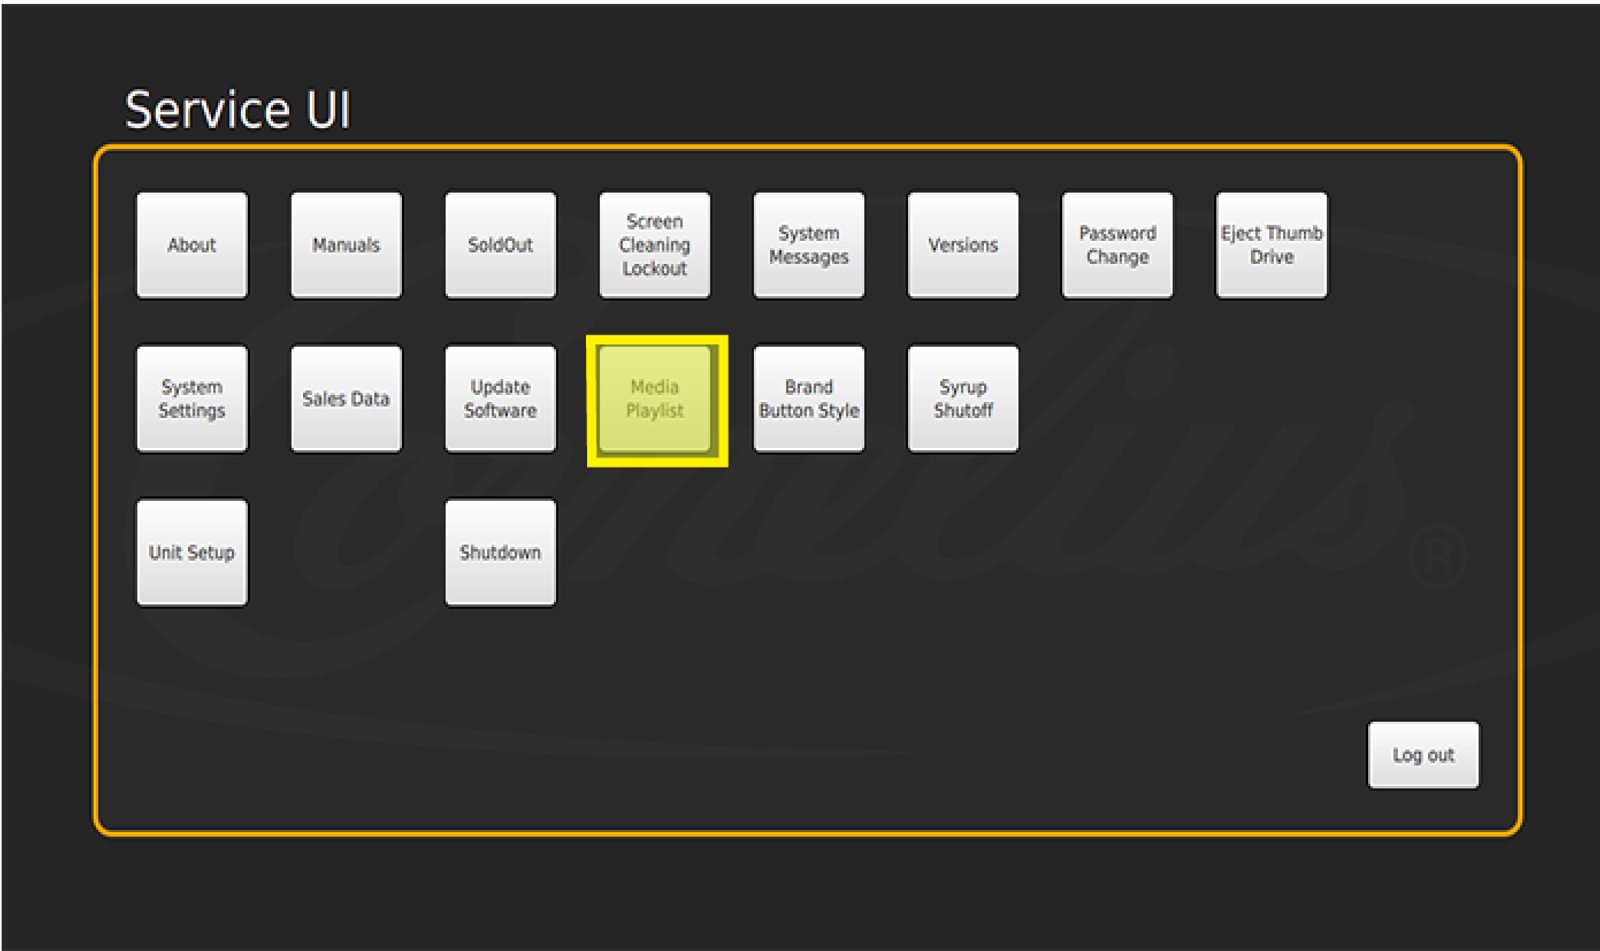
Select Media Playlist
Access the Media Playlist screen by entering the Service screen and selecting Media Playlist.
- The Media Playlist allows you to upload custom video and image content to display on the Home screen merchandiser.
- Note that videos must be in the following format: MP4 H.264 1920x800 pixels, and images must be in the following format: JPG or PNG file – 1920x800
-
Add or Remove Media
To add or remove media, follow these steps:
- Select Media Playlist
- Unplug the black USB cable (on the back door of the IDC Pro) and insert the USB drive containing media files to be displayed on the merchandiser.
-
Upload a Video
To upload a video to the IDC Pro from a USB drive:
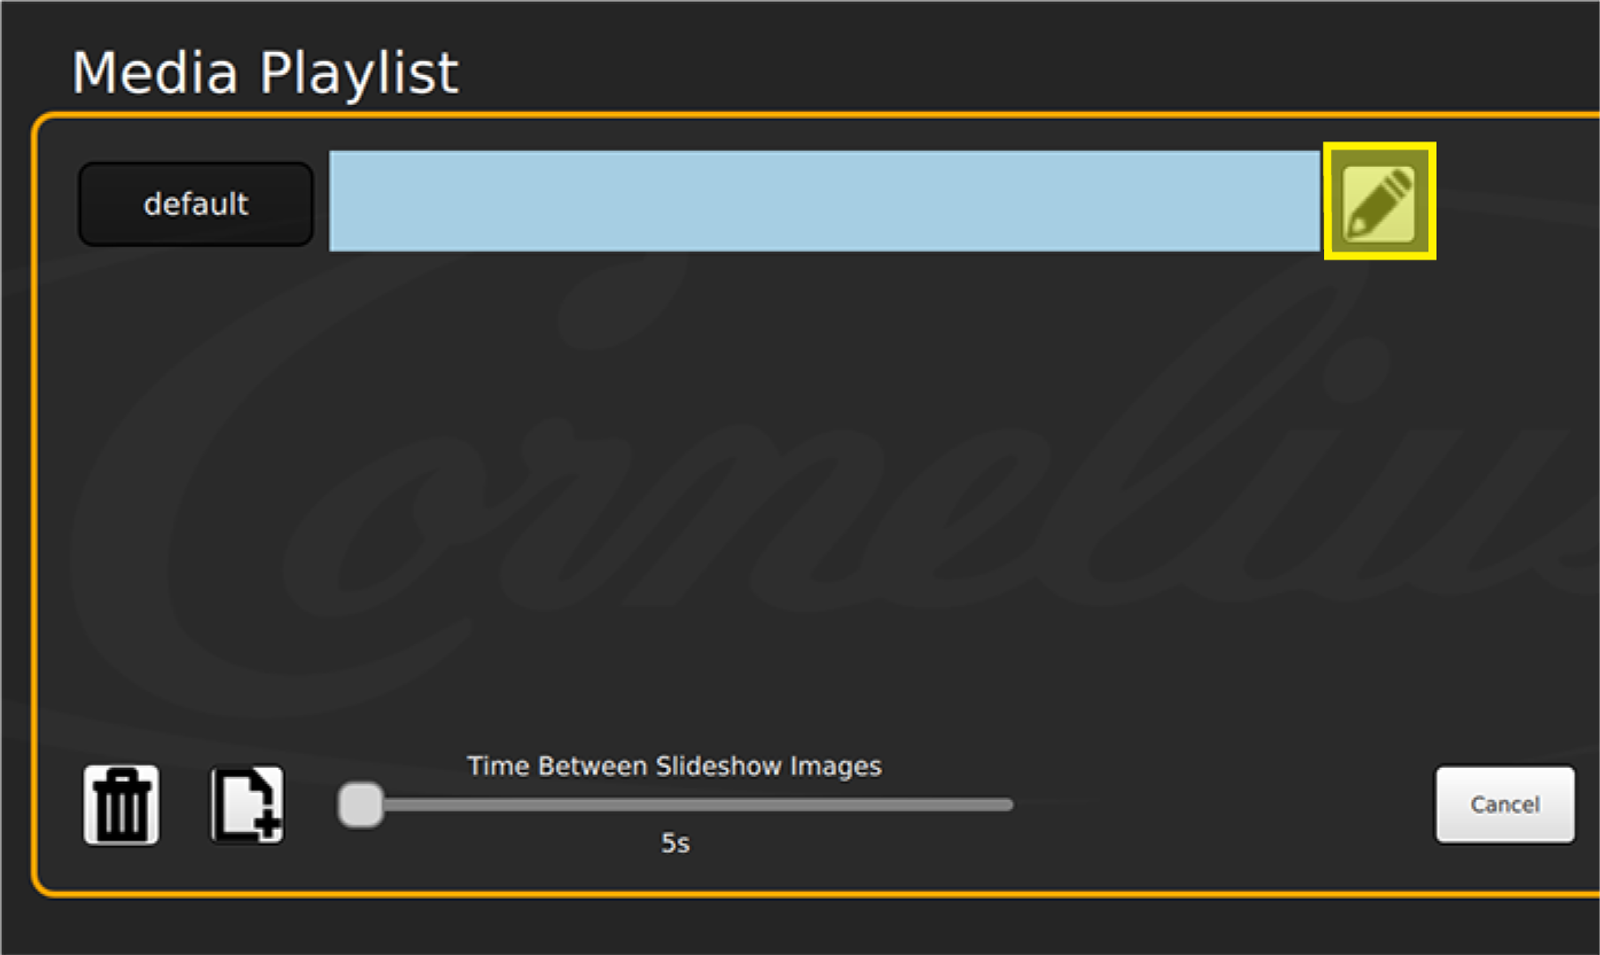
- Select the pencil icon on the right of any playlist. This allows you to edit the playlist.
-
Add/Delete Videos
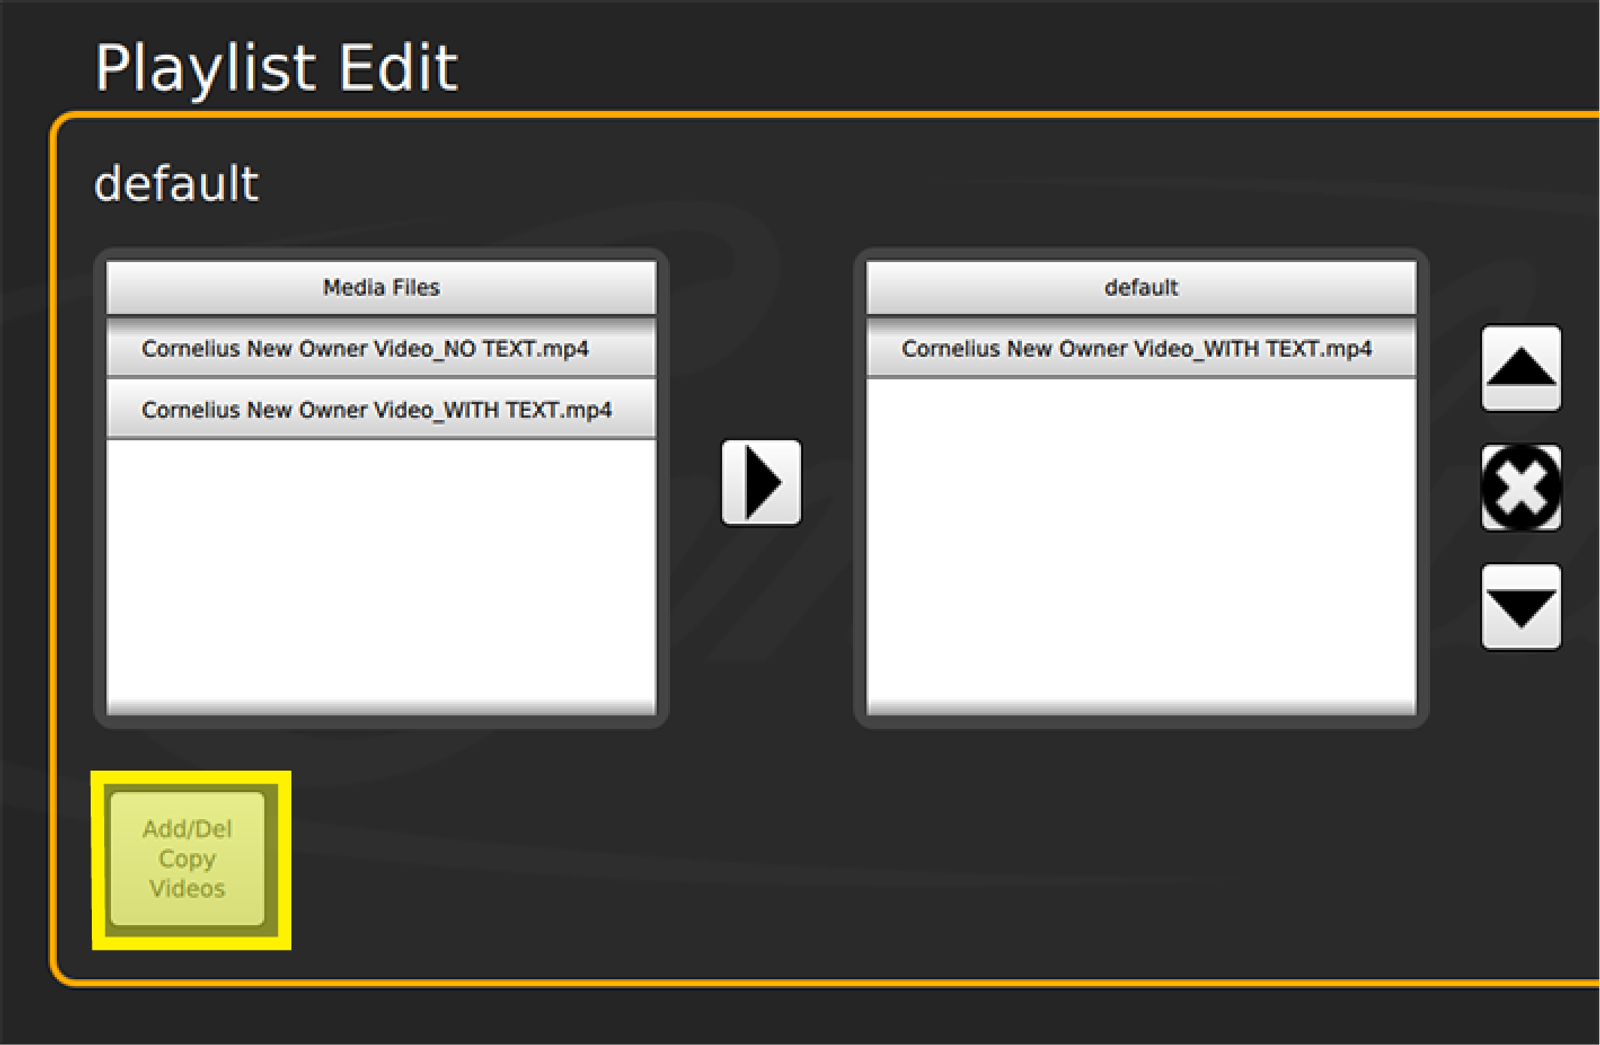
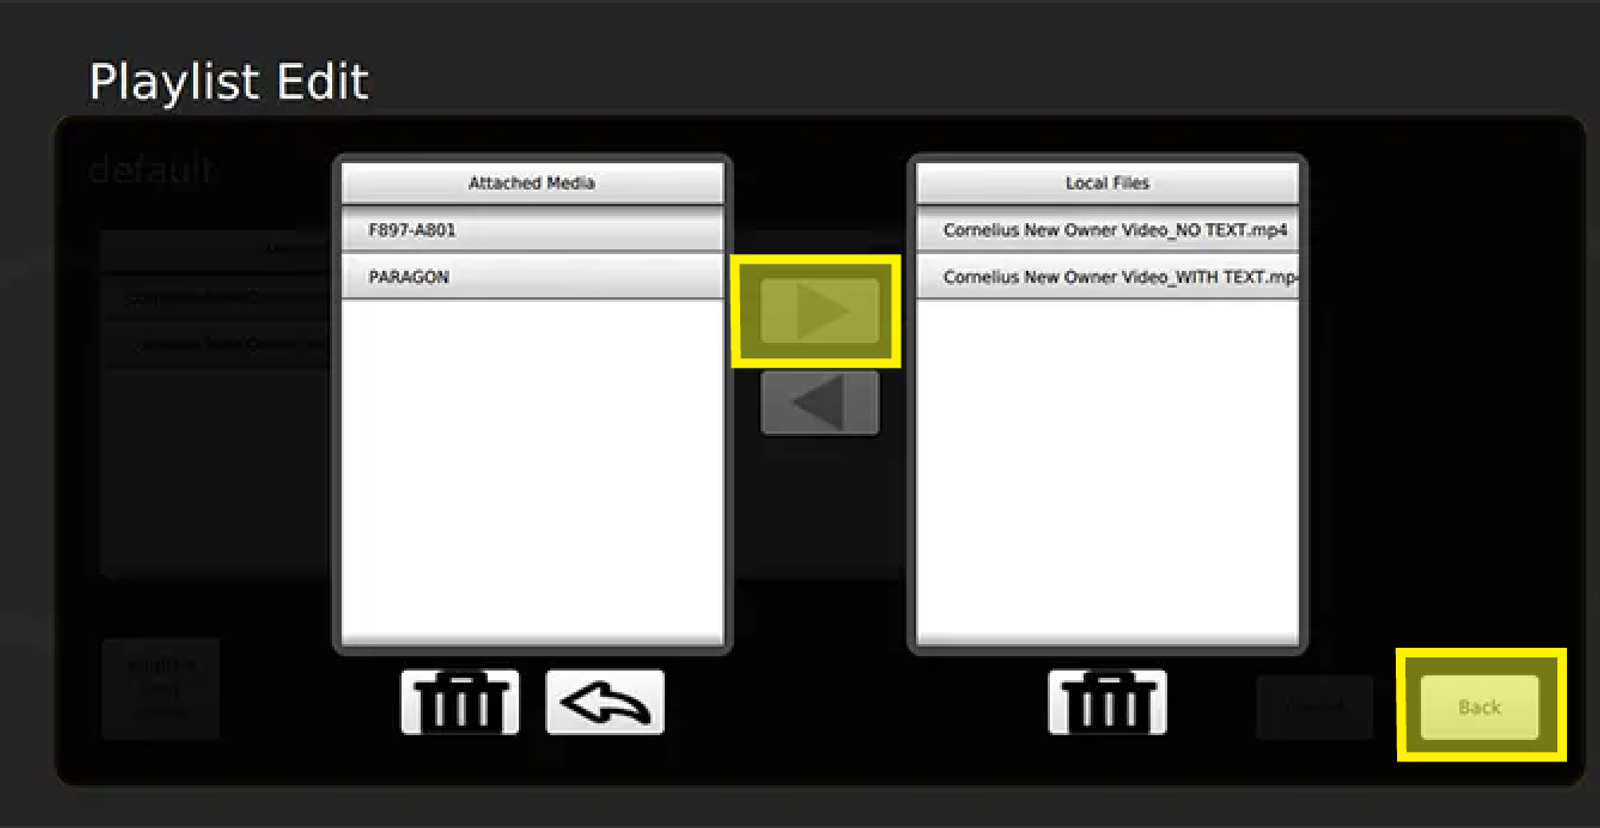
Then select Add/Delete Videos. You will see the title of the USB under the attached media folder. Select the title to open the flash drive.
-
Playlist Edit
Then select the media files you wish to copy. Touch the arrow right icon to copy the files to the unit’s hard drive titled Local Files. All files downloaded to the IDC Pro will be listed under Local Files.
To upload files from the IDC Pro’s Local Files folder to the flash drive, select the file in the Local Files folder. When it is highlighted blue, select the left arrow symbol to copy it to the Attached Media USB flash drive. Once the files are transferred, click Back to return to the Media Playlist screen.
-
Add to Playlist
To Add a photo or video to the playlist, select the pencil icon next to the playlist to which you will to add the media.
Select the video files you wish you copy to the playlist. Then press the arrow key to copy them over. Click Save once completed.
-
Playlist Order
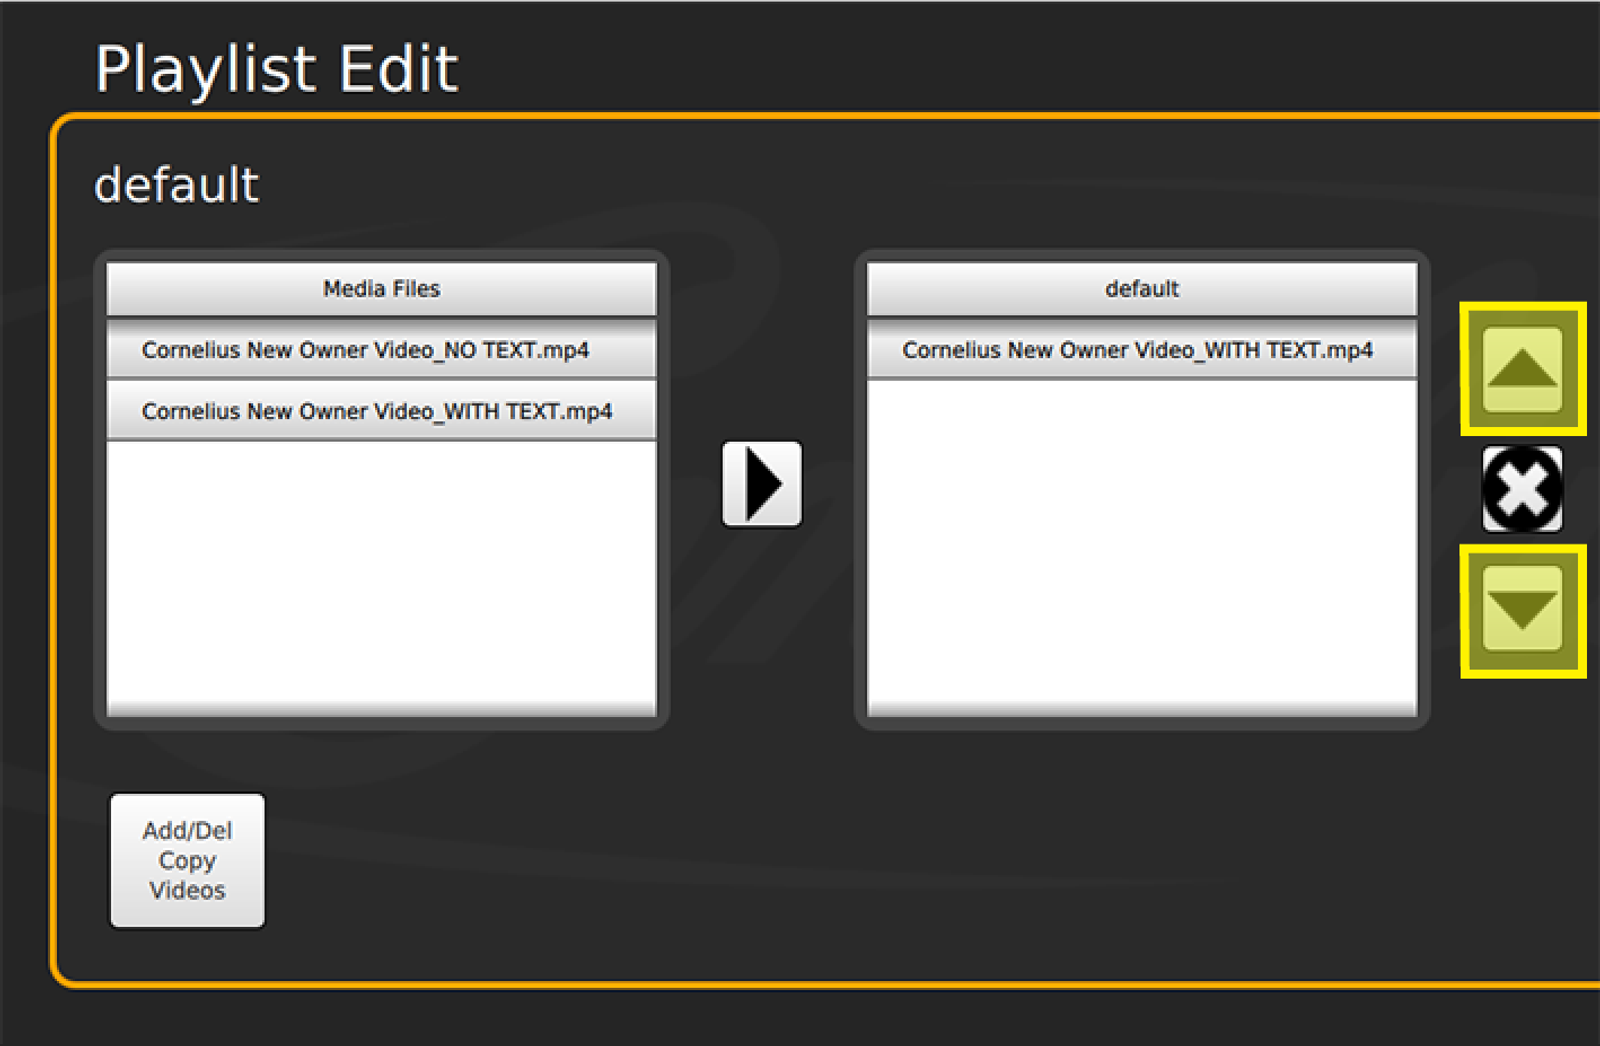
Note: The arrows on the right side of the screen allow you to adjust the order in which the media is played.
-
Remove Item
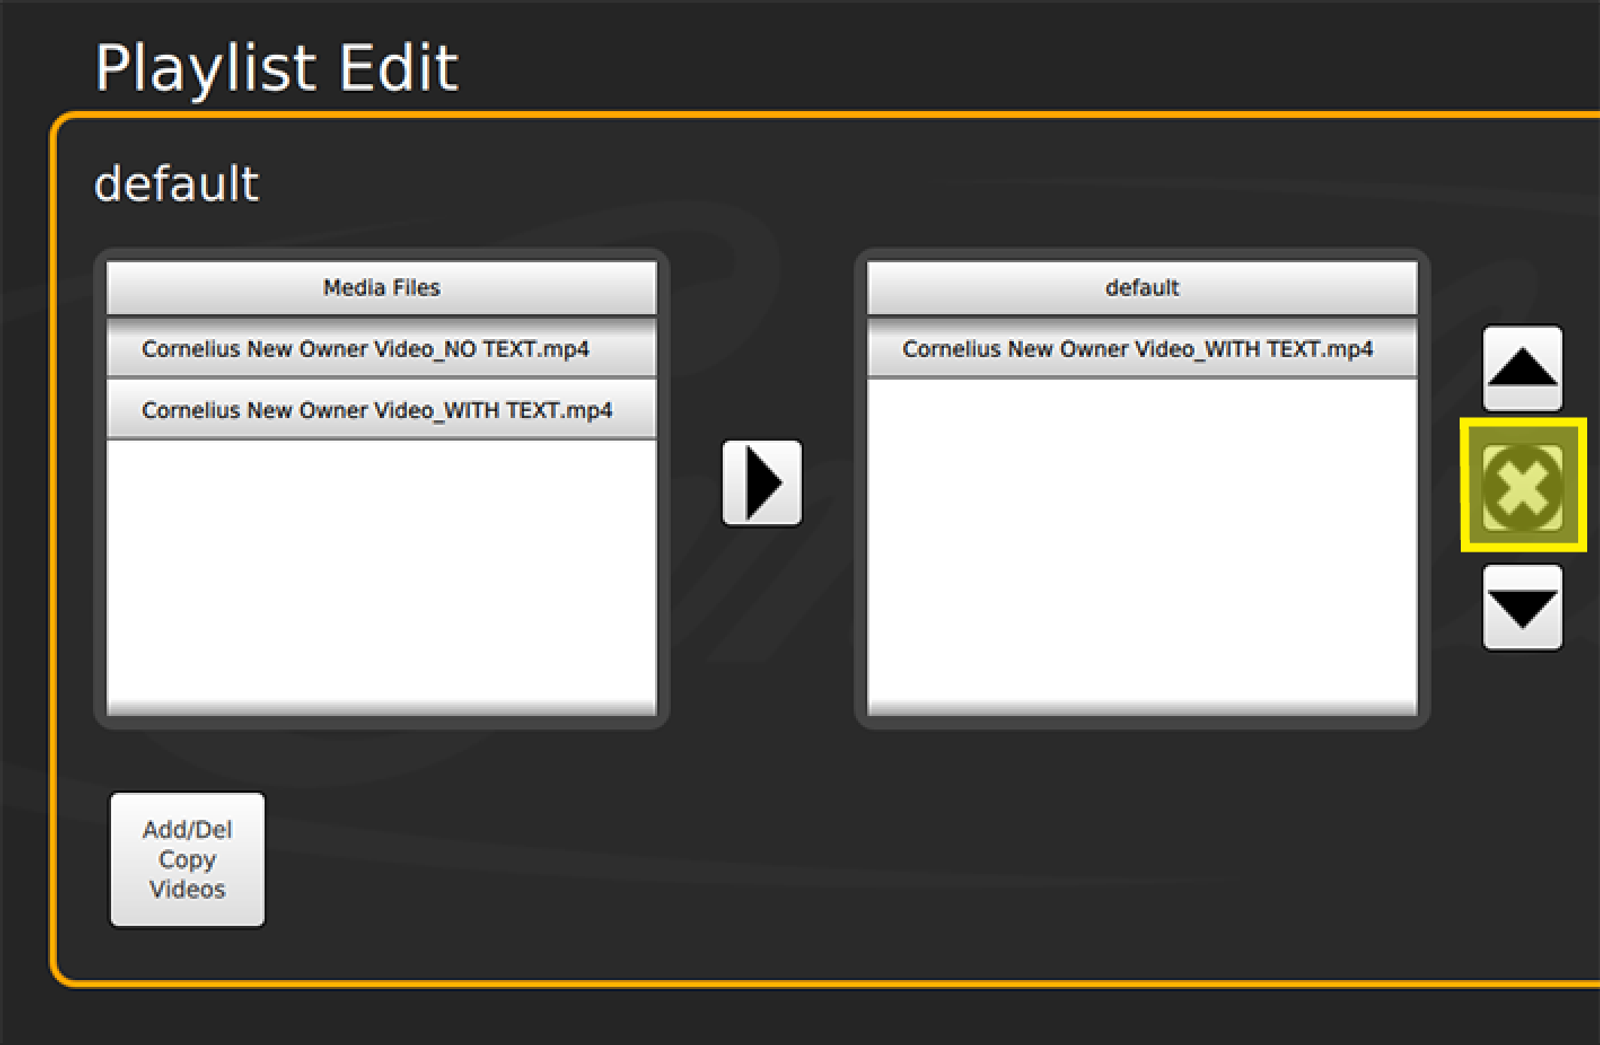
To remove a file from the playlist, select the file, then select the X next to the playlist folder.
-
Add Playlist
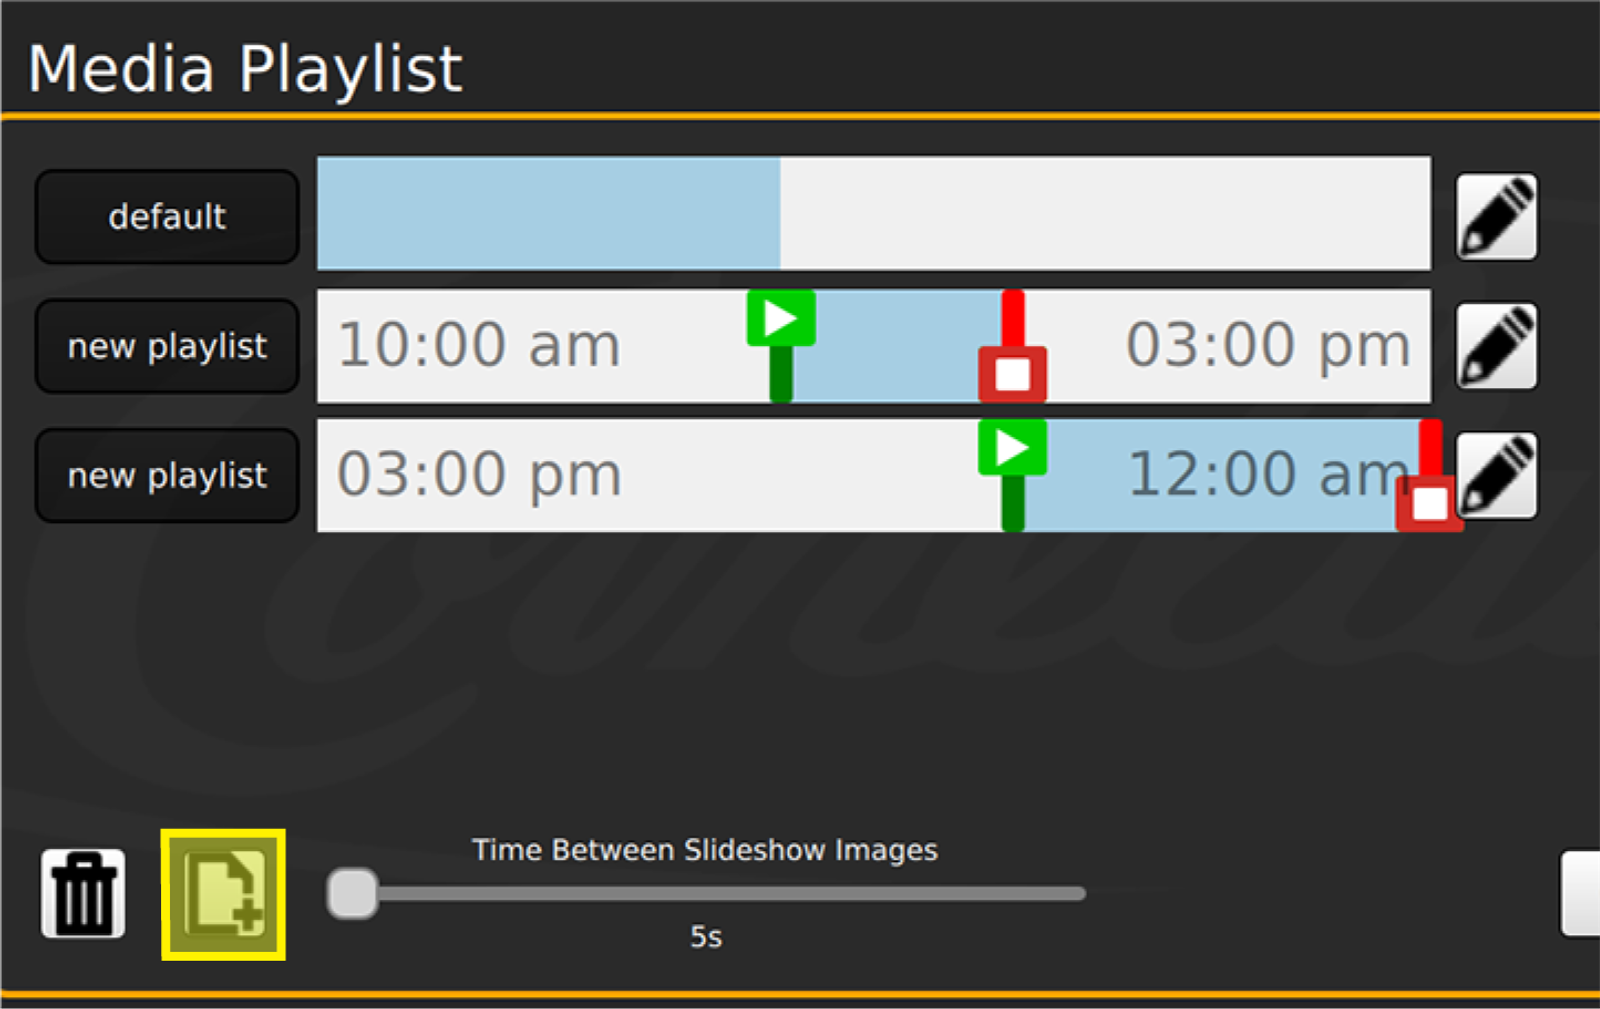
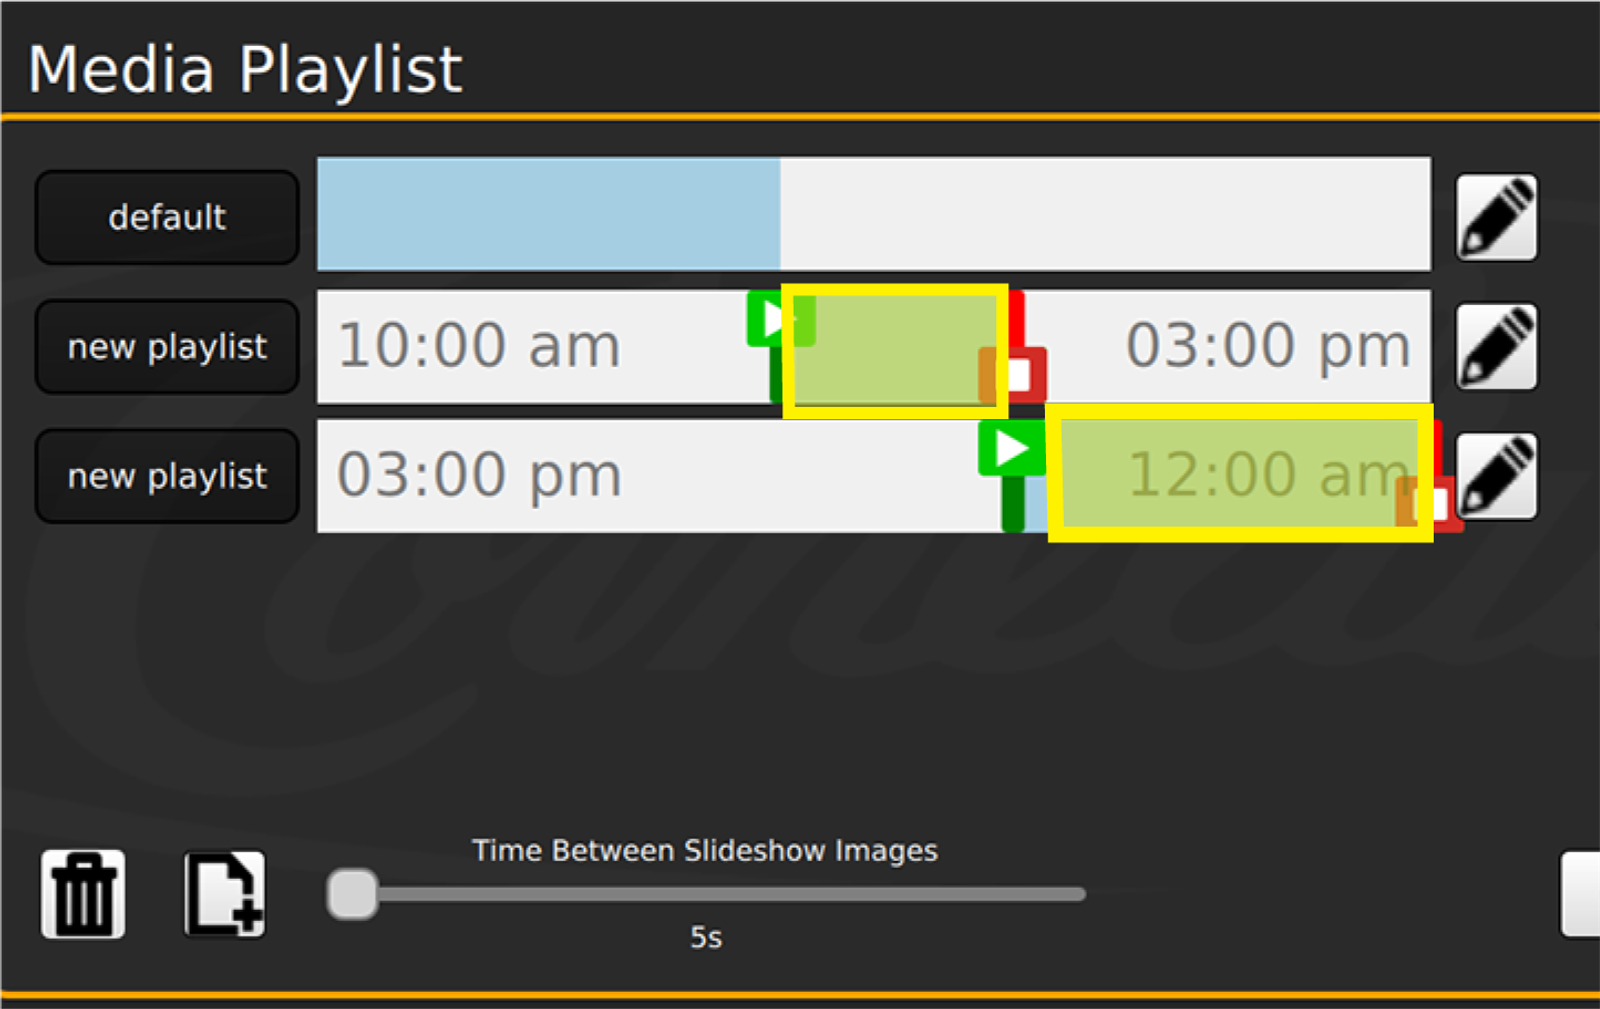
To Add a new playlist, press the Add icon.
-
Adjust Time Frames
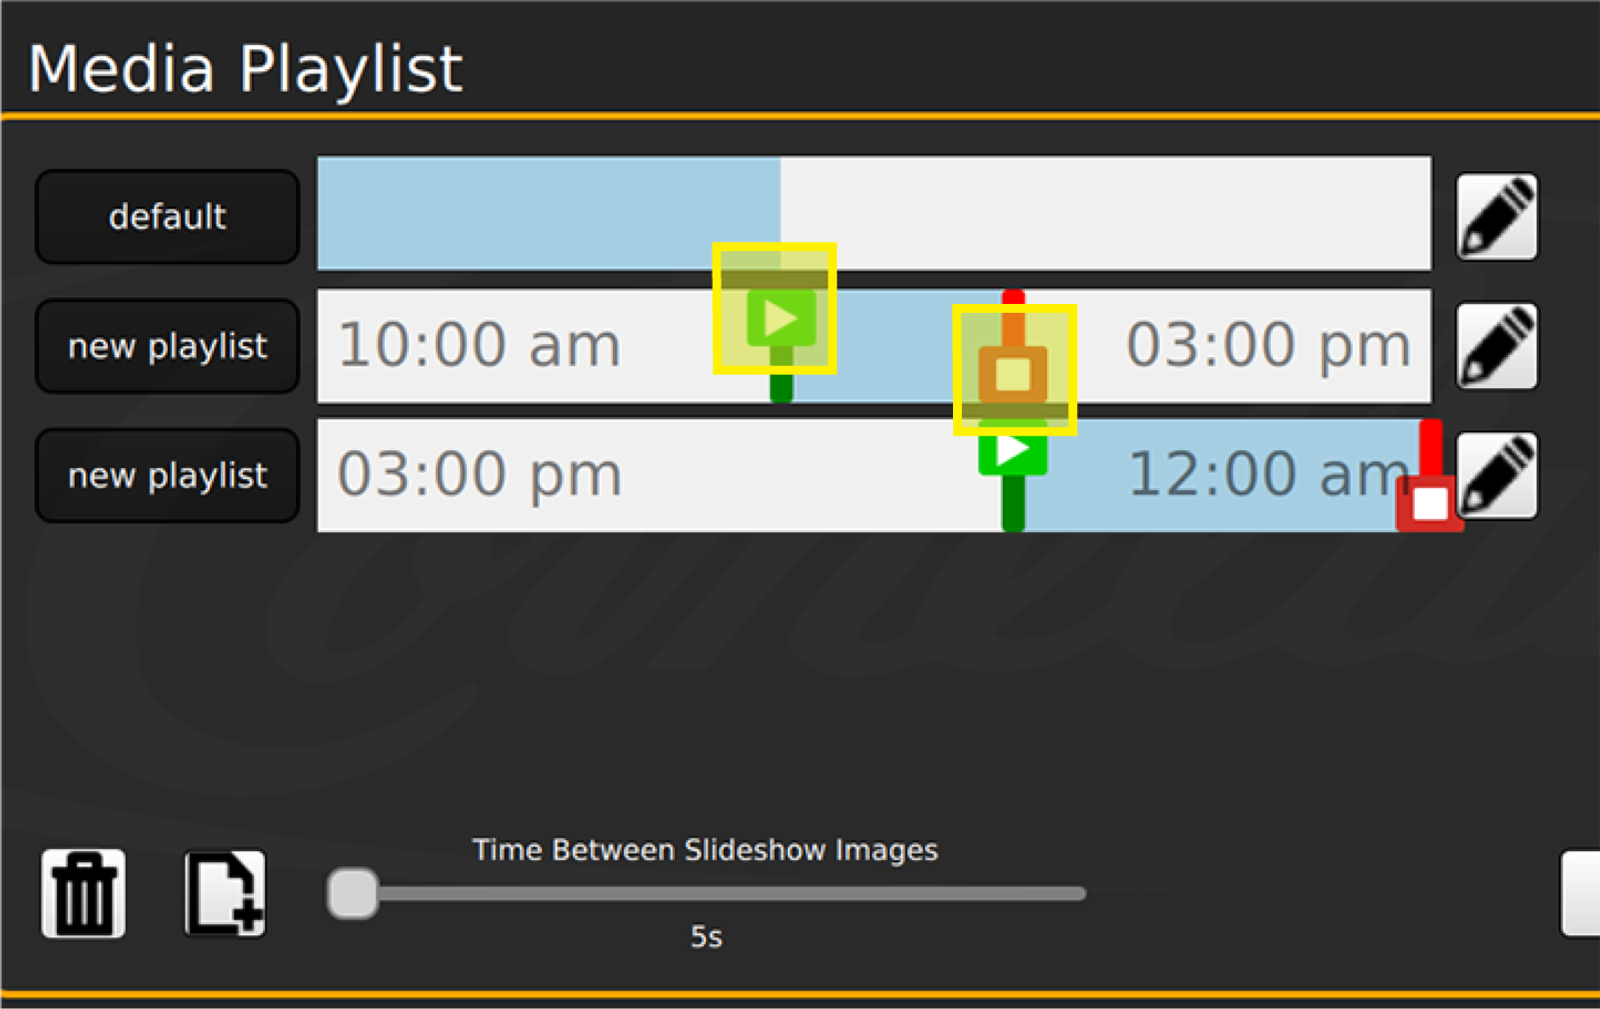
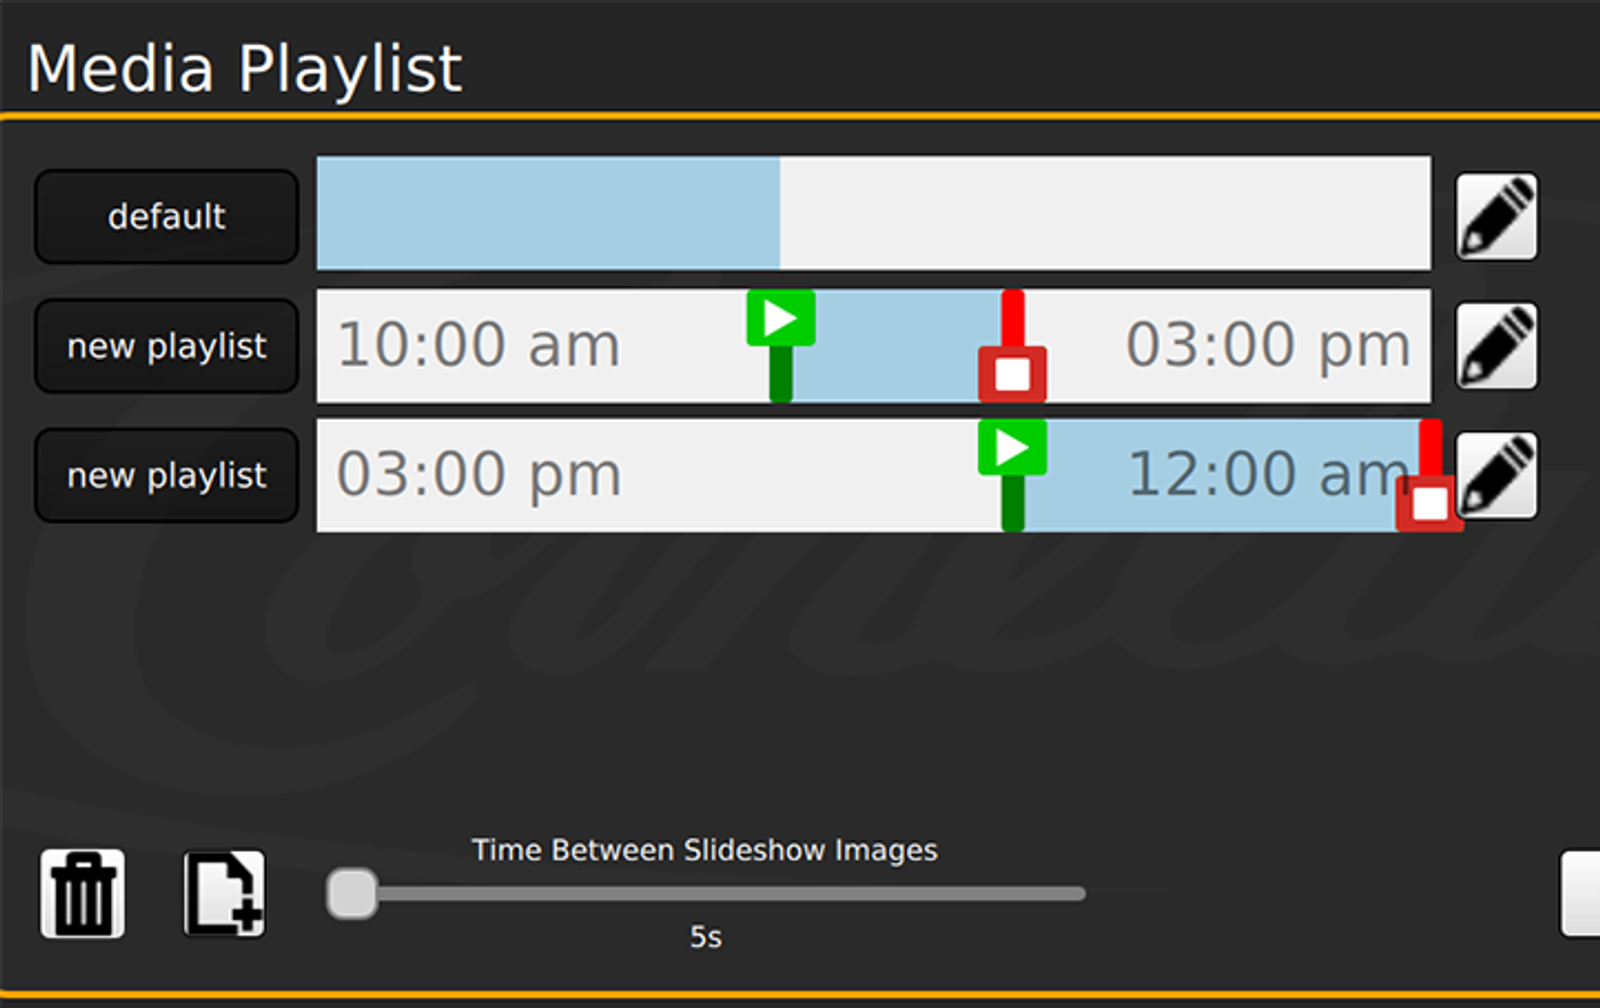
Once the new playlist is added to the screen, you can adjust the time frames you would like the video files on a particular playlist to play. Make adjustments by sliding the red and green handles to indicate the desired time frame.
The blue shaded frames indicate when content on the playlist will display.
-
Time Frame Example
In the example shown, the new playlist will play from 10am to 3pm, and new playlist2 will play from 3pm to 12am.
If no specific time is assigned, the default playlist will automatically play. If you are displaying still images on the merchandiser, the Time Between Slideshow Images meter indicates how long the displayed images will be displayed.
-
Remove Playlist
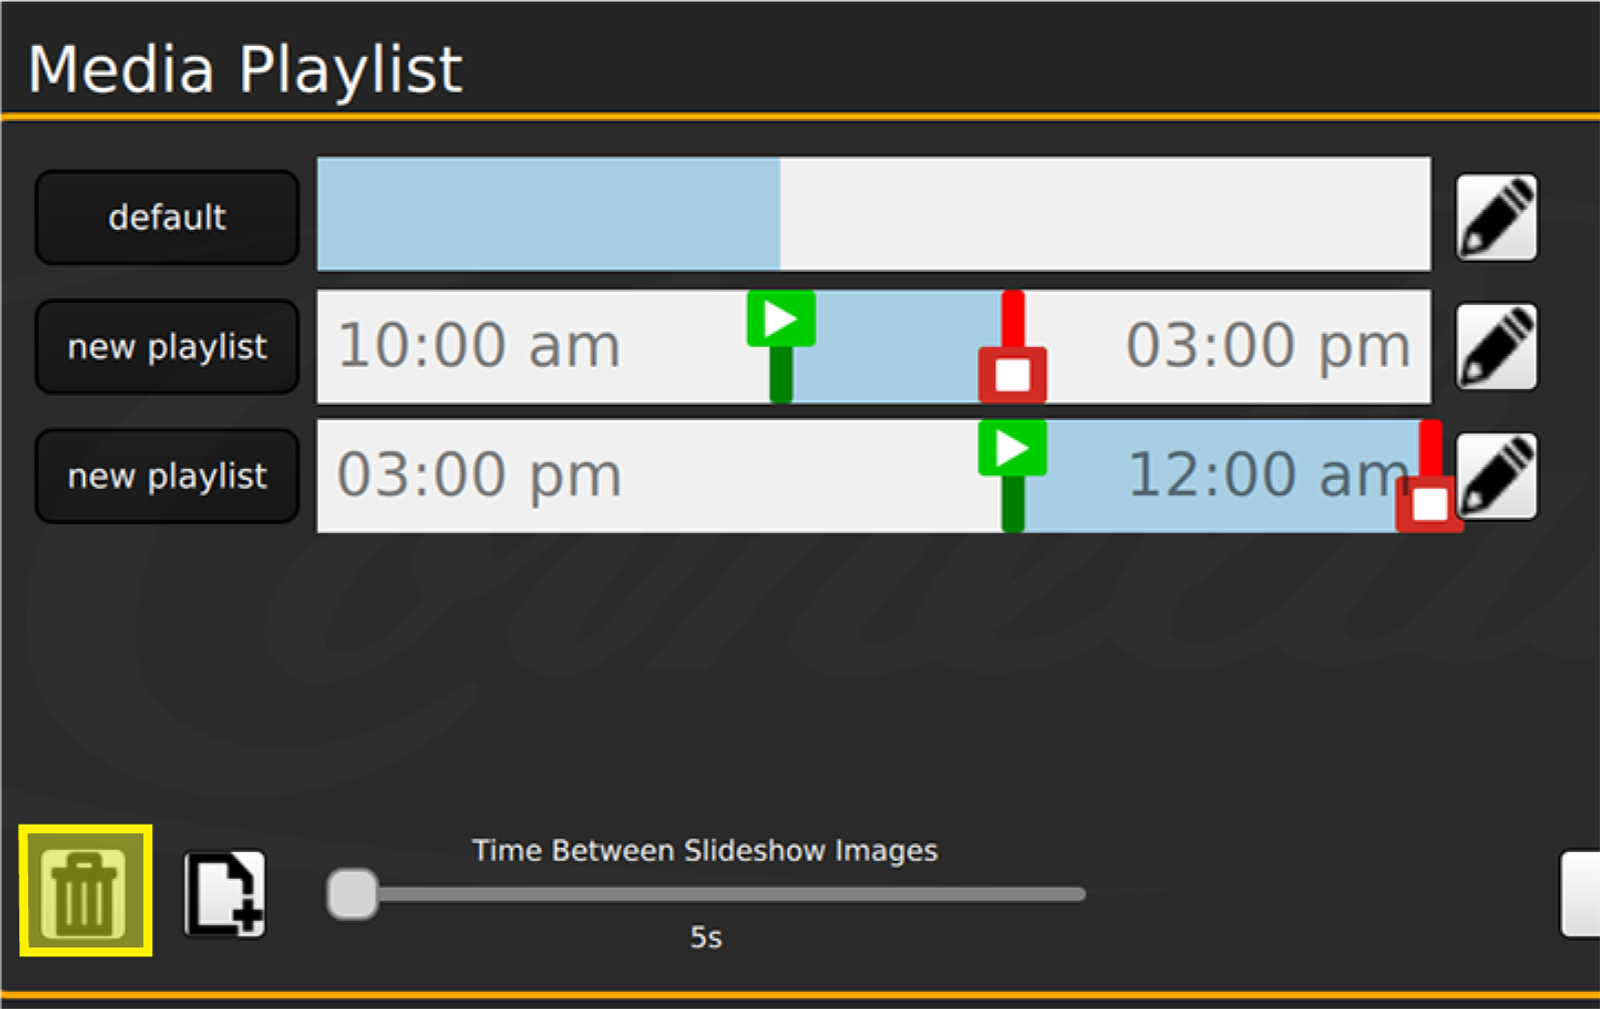
Remove a playlist by first selecting the Trash Can icon, which will highlight the playlists in red. Select the name of the playlist to be removed (outlined in red). Select the Trash can icon to exit the Playlist Removal mode.
Note: If you remove video or images from the Local Files they will be removed from the IDC Pro hard drive.

-
If Screen Black
If you do not select a video or image to play for a playlist, the merchandiser screen will remain black. If you encounter a black screen, you should attempt to enter the Service UI.
If you can enter the Service UI, check the media playlist to ensure you have videos or images selected for the playlist.
